Creating a Functional and Inspiring Sewing Environment
A well-organized sewing space not only enhances productivity but also fosters creativity and joy in your craft. Sewing space organization matters. Whether you are an occasional hobbyist or a seasoned designer, a quilter, or you love making apparel or items for your home, the layout and organization of your sewing area play a crucial role in ensuring a seamless workflow.
I really started thinking about the organization of my sewing space after reading several issues of Where Women Create. So many beautiful work spaces – and each one a personal representation of it’s owner.
If we are fortunate enough to have a dedicated space to create, it’s well worth it to take some time to make that space function effectively for how we want to use it. Equally important, it should reflect the person using that creative space. All of that means different things to each of us.
Workstations
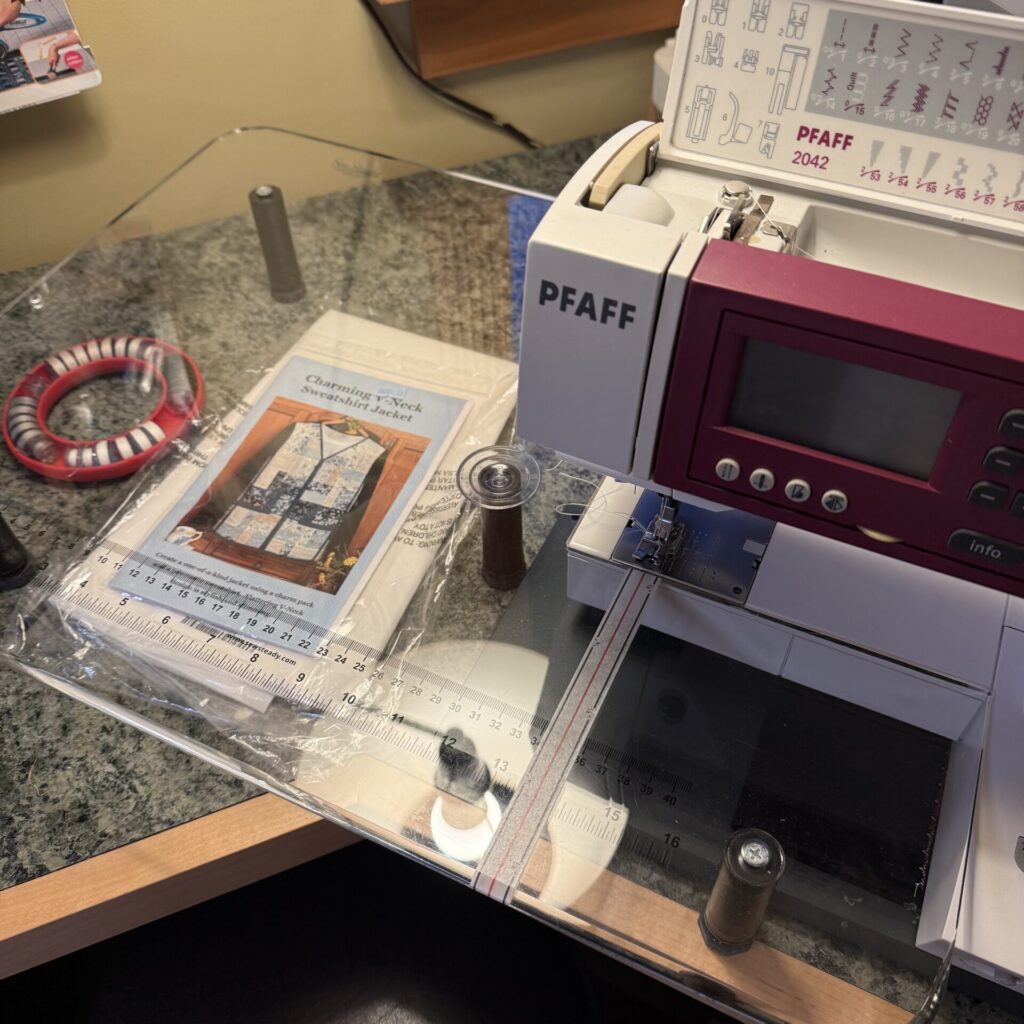
The Sewing Machine Station
Your sewing machine station is the heart of your workspace. Position the machine at a height that allows your forearms to rest comfortably parallel to the table while you sew, reducing strain on your shoulders and neck. Consider using an adjustable chair with lumbar support to maintain a healthy posture. Keep essential tools like scissors, seam rippers, and bobbins within arm’s reach to avoid unnecessary reaching for these items.
I also use a Sew Steady Extension Table, made specifically for my machine. I place the pattern instructions I am working on under the clear table so I can easily refer to them as I am stitching my blocks.
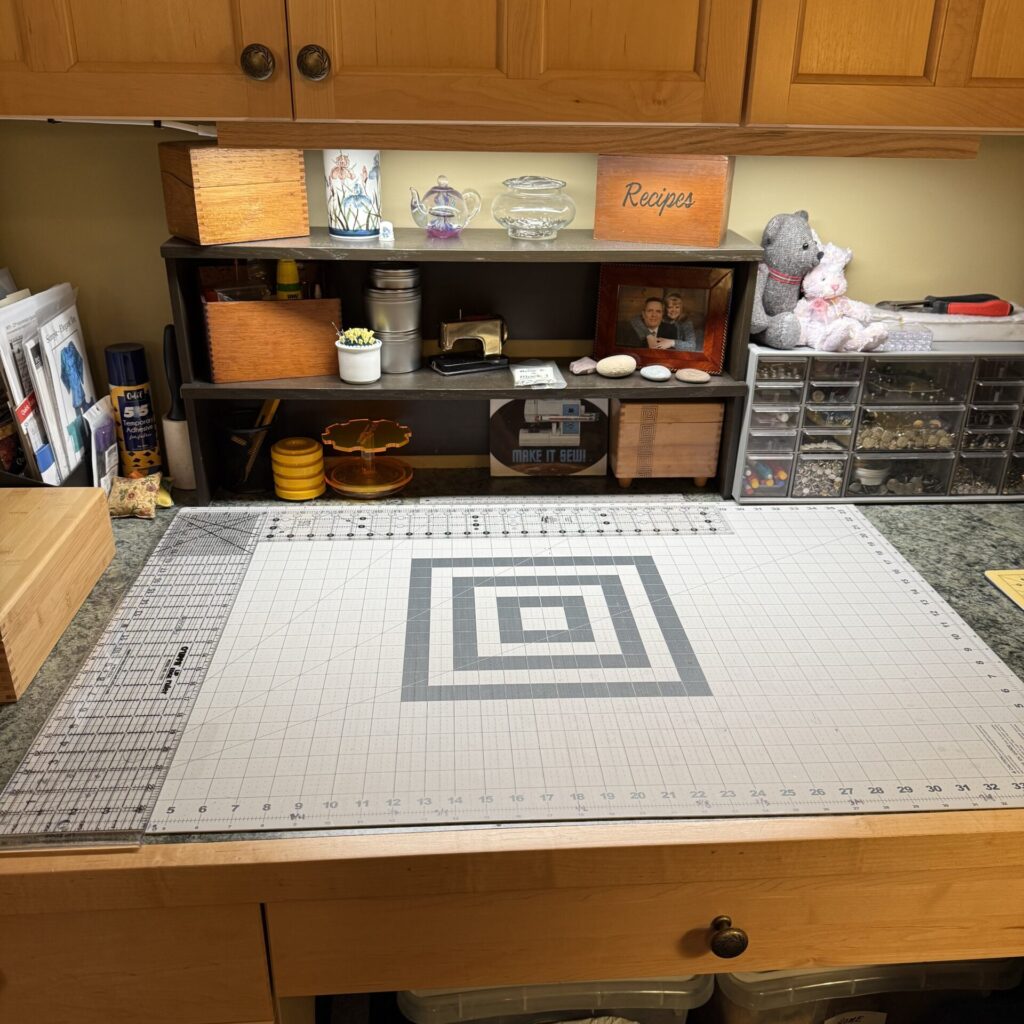
The Cutting Table
A cutting table should be very sturdy and slightly higher than a standard desk to prevent bending and straining your back while cutting fabric. Adjustable tables are ideal for accommodating different heights and preferences. My cutting table is at standard kitchen counter height (36″). I also stand on a cushioned mat – it helps both my feet and my lower back when I’m standing for a long time.
- The surface needs to be large enough to lay out patterns and fabrics without overcrowding.
- A good quality, self-healing cutting mat can protect the table and provide a smooth cutting experience.
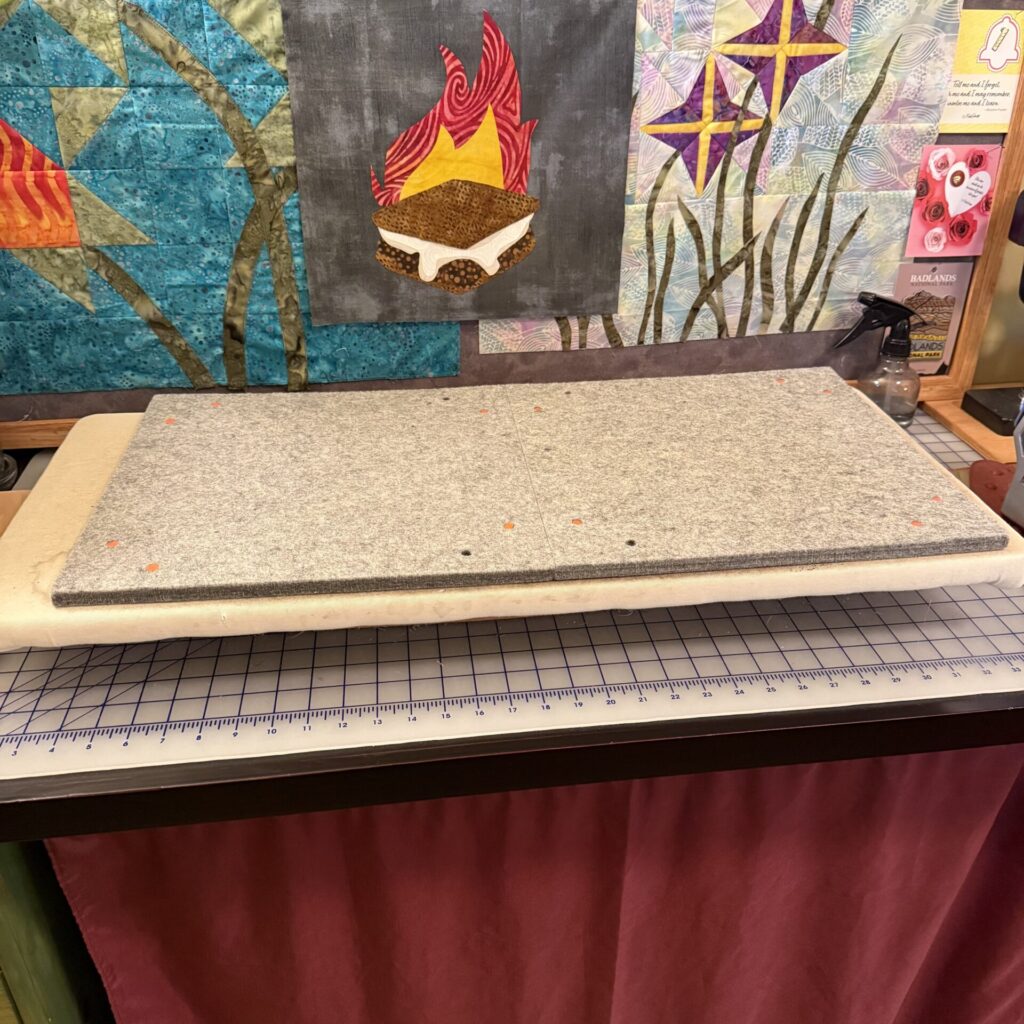
The Pressing / Ironing Station
Place your ironing station near your sewing machine to minimize the effort of moving back and forth. Use an ergonomic ironing board that adjusts to a comfortable height, allowing you to press seams and fabrics without straining your wrists or back. Keep starch sprays, pressing cloths, and other ironing accessories organized in a nearby drawer or shelf.
While I do have a collapsible ironing board that I set up if I need to press yardage, I use my tabletop pressing station for everything else. It is made from a tabletop ironing board that I adapted with a square plywood top. That was covered with a cut-down ironing board cover and topped with a pair of wool pressing mats. This is a perfect solution for my needs.
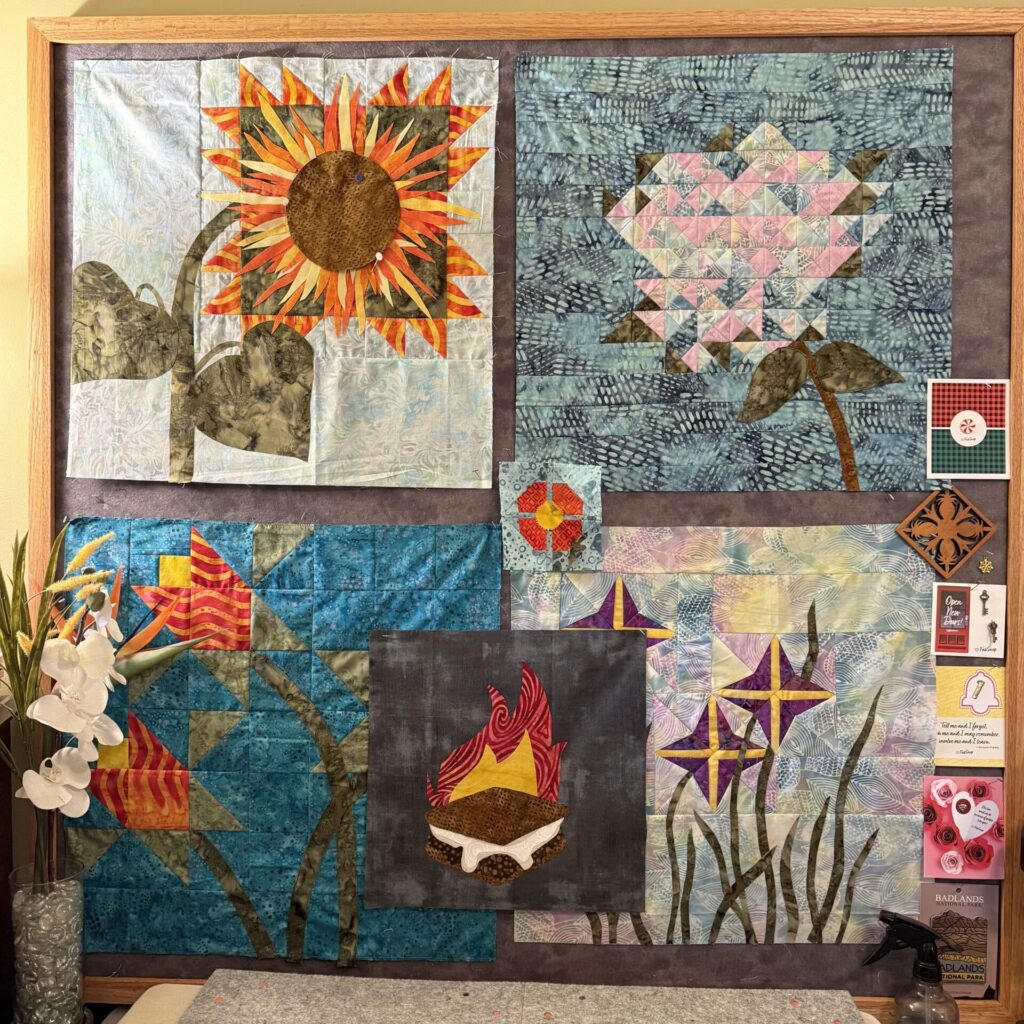
The Design Wall
For planning and designing, a dedicated space equipped with a design wall (bulletin board or cork board) for pinning ideas, sketches, and inspiration can be invaluable. I do have a lovely 4-foot square design wall in my sewing space. We built it from a leftover piece of insulation board, some flannel, and some scrap wood.
The majority of my designing happens in the office at my computer. I’m a huge fan of EQ8 from the Electric Quilt Company. This software allows me to scan in my fabrics and use them in my designs, swapping one fabric for another without picking up a rotary cutter. At least until I’m satisfied with my design and ready to make the project.
Storage Solutions
Organizing Fabric
Fabric can quickly take over your sewing space if not properly stored. Fold larger pieces neatly and organize them by color, type, or project in clear bins or baskets. For smaller scraps, a dedicated drawer or box labeled “Scraps” can keep them accessible for future use. Hanging racks or shelves with dividers can make it easier to locate the fabric you need without rummaging through piles.
A fabulous way to store fabrics is by wrapping them around a fabric storage board (also known as a comic book board). Place them on shelves like books and organize them by color, type, or in whatever way works best for you.
My fabrics are stored in labeled bins and organized by type (batiks, tone on tone, novelty prints, etc.). Small pieces (1/4 yard or less) are stored the same way, but I use clear plastic shoe boxes for these. I wrote more about stash storage here: How Do You Organize Your Quilting Fabric?
Storing Notions and Thread
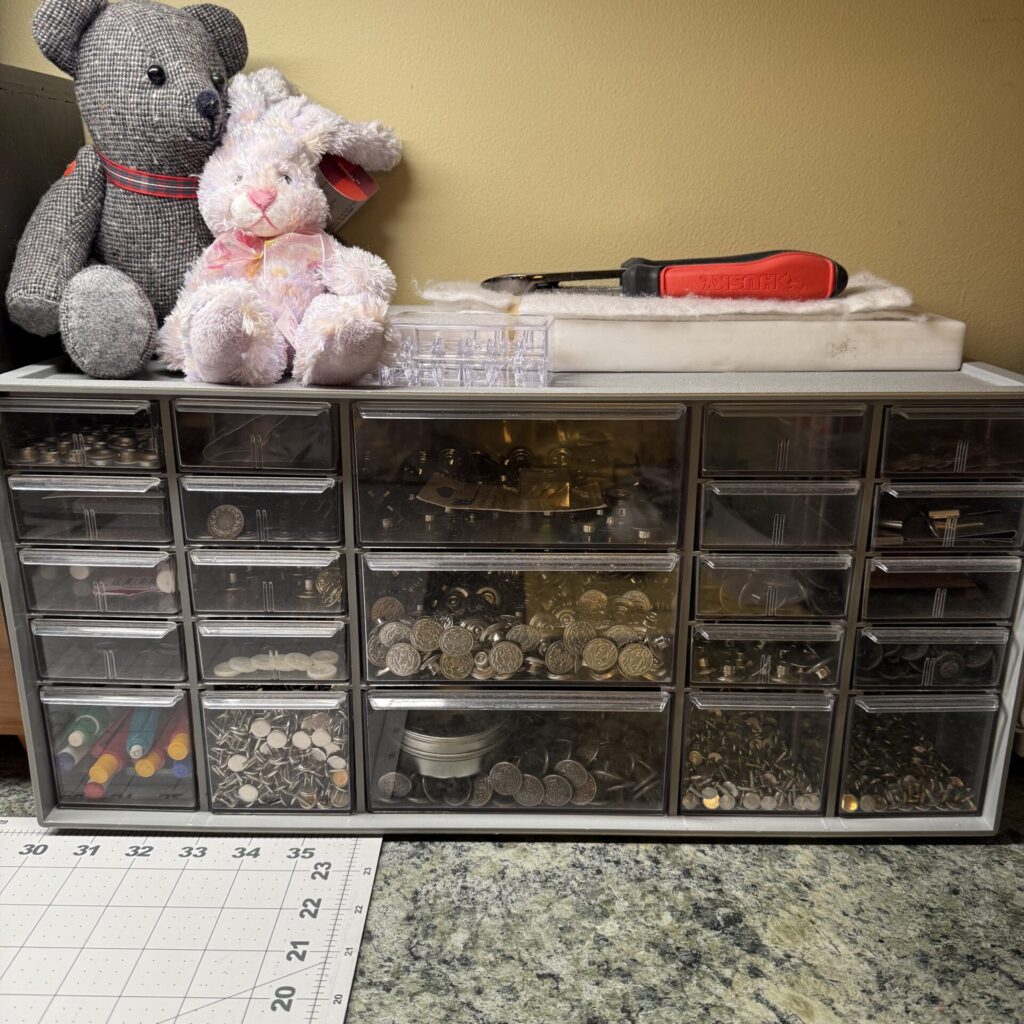
Notions, such as zippers, buttons, and elastic, can be neatly stored in transparent tackle boxes or labeled jars. I use a small cabinet that would normally be used for nuts, screws and other small fasteners to store many of my notions. This type of cabinet can be picked up at any hardware store.
Thread spools should be arranged on thread racks to keep them visible and prevent tangling. Another option is storing them in shallow drawers lined with dividers, which prevents threads from rolling around. Group threads by color for quicker selection during projects.
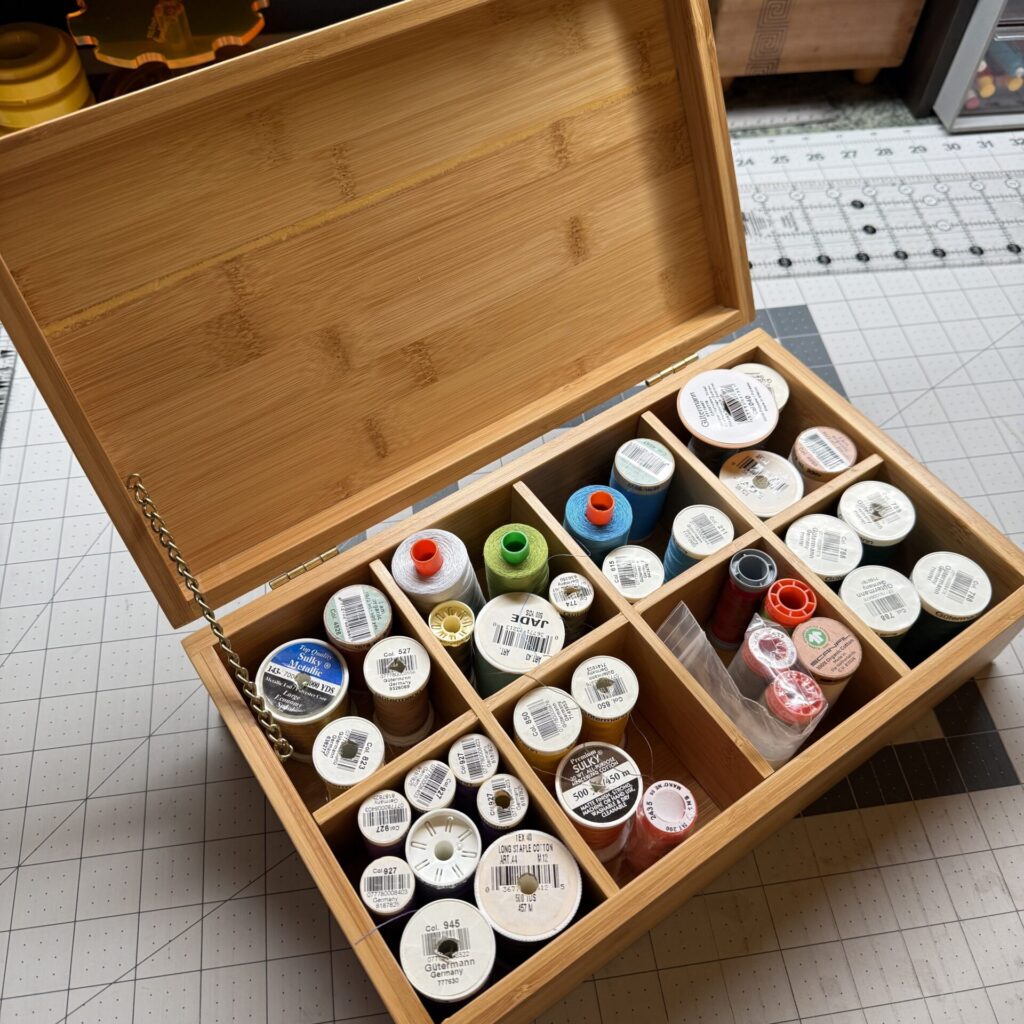
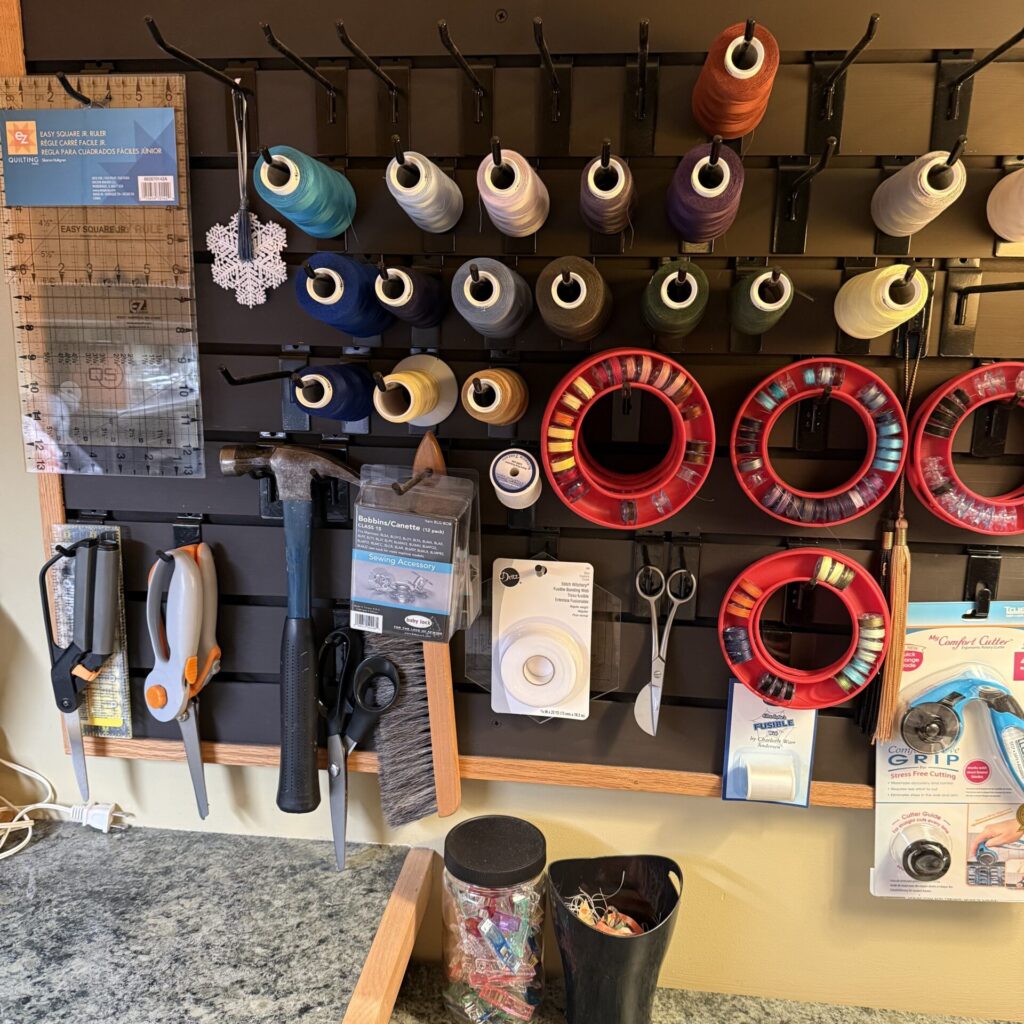
It’s important to note that your thread should be kept away from direct sunlight to prevent fading and weakening of the thread. I store my cones on pegs on a piece of slat wall, right next to my sewing machine. Small spools are stored in a bamboo tea chest – it perfectly holds the thread, and the partitions allow me to arrange it by color.
Books and Patterns
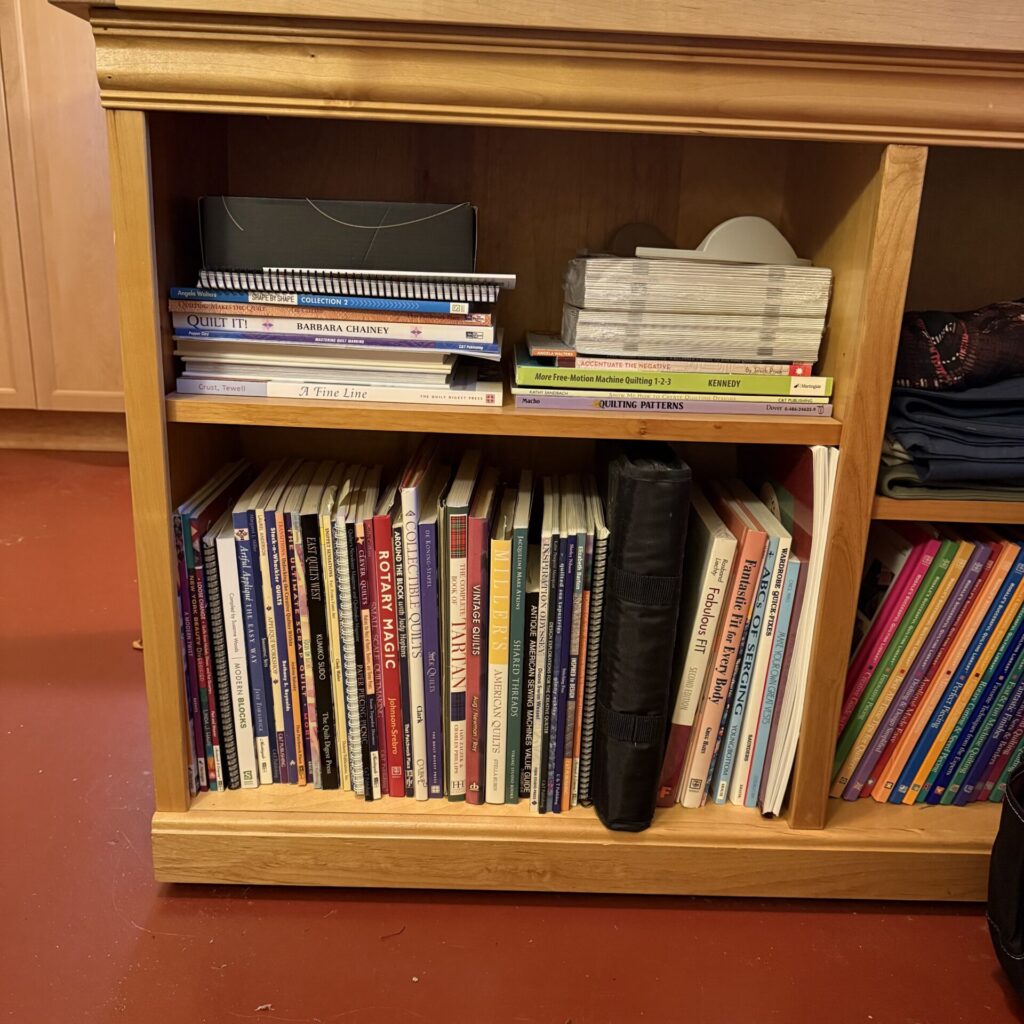
Sewing books and patterns often occupy a fair amount of space. Use tall bookcases or shelving units to organize sewing books by theme or difficulty level. Patterns can be stored in filing cabinets with labeled folders for easy categorization, such as “Dresses,” “Tops,” or “Accessories.” Another creative solution is using magazine holders to keep patterns upright and neatly organized. I have my books stored in a low bookcase at the front of my sewing table.
Rulers and Measuring Tools
Rulers, measuring tapes, and templates are indispensable in sewing. Pegboards mounted on the wall are excellent for hanging these tools within easy reach. Alternatively, dedicate a narrow drawer to rulers and use drawer organizers to prevent items from shifting. Ruler racks are also a great way to store rulers and templates. My room doesn’t have wall space for a ruler rack or I would be using one. My smaller rulers hang on a peg on the slat wall. The long rulers just live on the cutting table.
Other Tools and Equipment
For miscellaneous tools like rotary cutters, pins, and marking pens, use a combination of small bins, sectional organizers, and labeled containers. Keep these tools in proximity to the workstation they are most often used in—for example, rotary cutters by the cutting table and marking pens near the planning station.
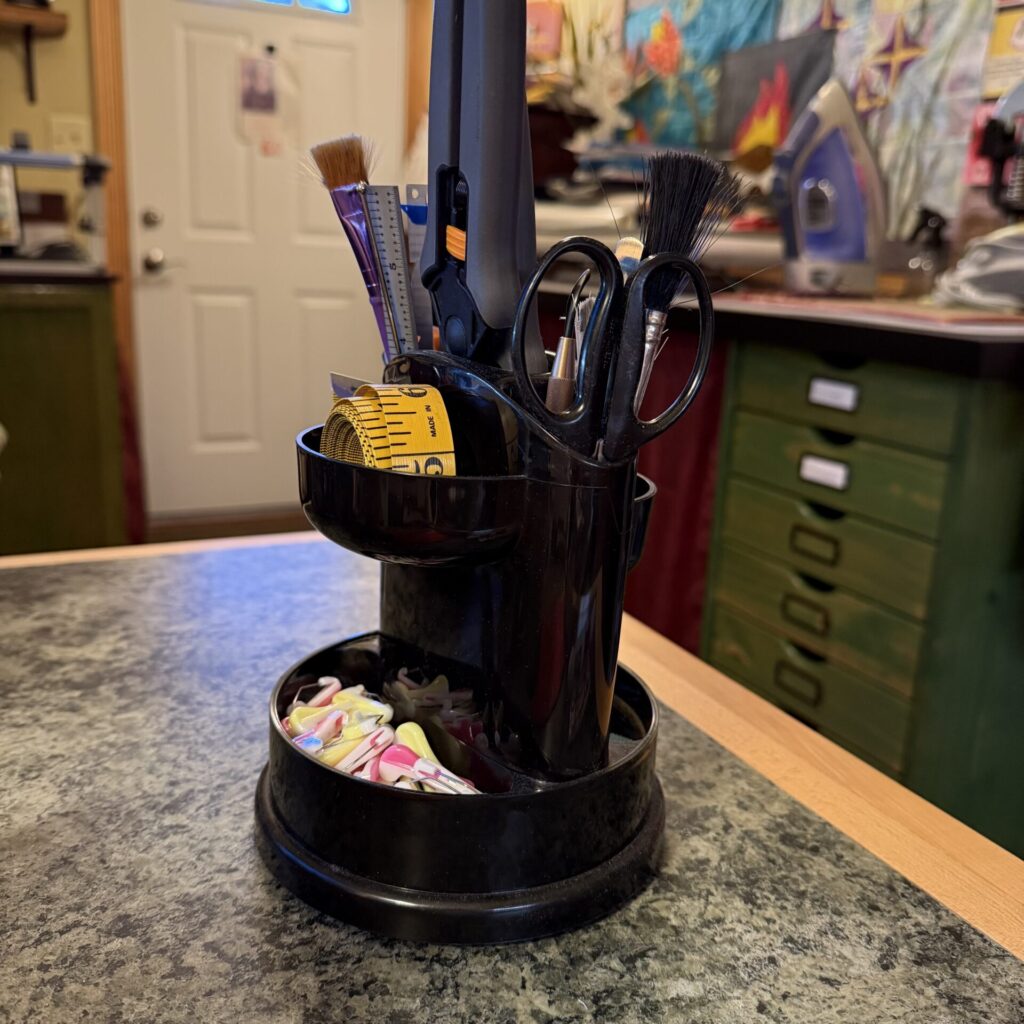
I use this rotating organizer to keep all my small scissors, tweezers, clips, etc., right next to the sewing machine. It holds a lot and takes up such a small amount of space.
Maintaining an Organized Space
Lighting and Layout
Good lighting is essential in all workstations. Combine overhead lighting with focused task lighting, such as desk lamps or under-shelf lights, to eliminate shadows while sewing, cutting, or pressing. Arrange stations in a logical flow—cutting near fabric storage, ironing close to the machine, and tools placed strategically to ensure efficiency in movement.
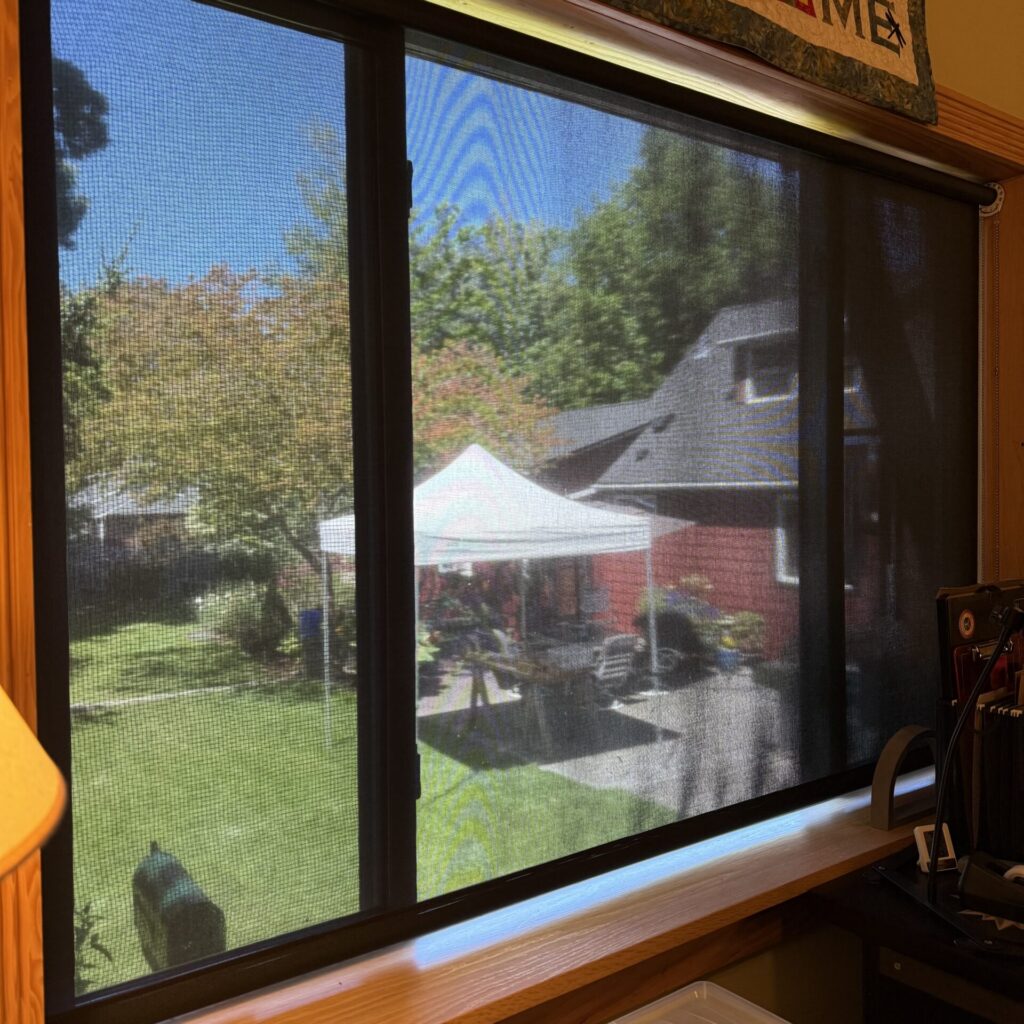
You can never have too much light! That being said, be careful of UV light from the windows. It will fade many fabrics (and other things) very quickly. I installed a UV-rated roller shade of the type commonly used in restaurants. I can see through it, so I don’t feel like I’m working in a cave – but my fabrics are protected. I chose a black shade, and if I were to do it again, I would choose one in a lighter color.
Decluttering and Regular Maintenance
Periodically declutter your sewing space by evaluating unused tools, excess fabric, or outdated patterns. Donate or recycle items that no longer serve your needs. Regular maintenance is key; allocate time each week to clean surfaces, restock supplies, and reorganize misplaced items. I have found that I enjoy purging my space of unused quilty treasures once in a while. It frees up space in my sewing room (and in my brain).
I also use a small hand vacuum to make quick work of dust and the threads that get everywhere.
Personal Touches
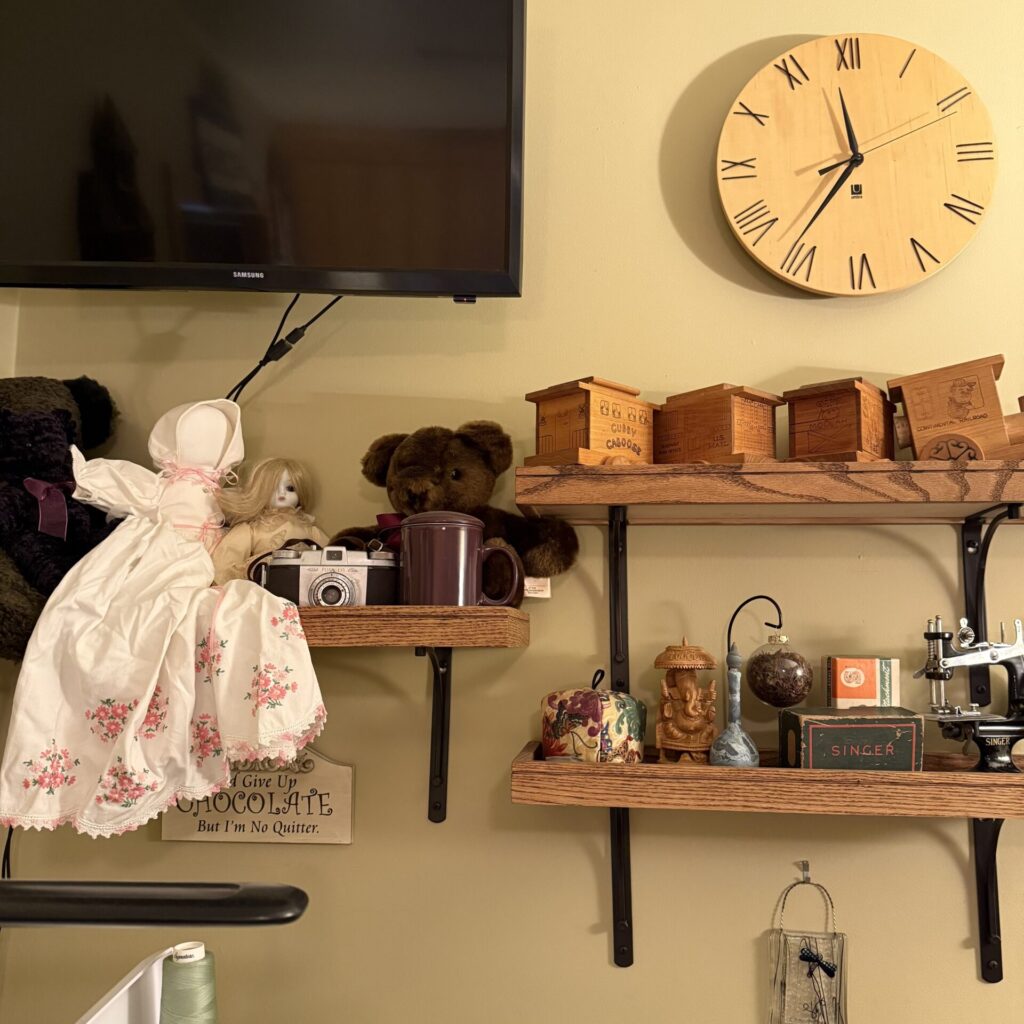
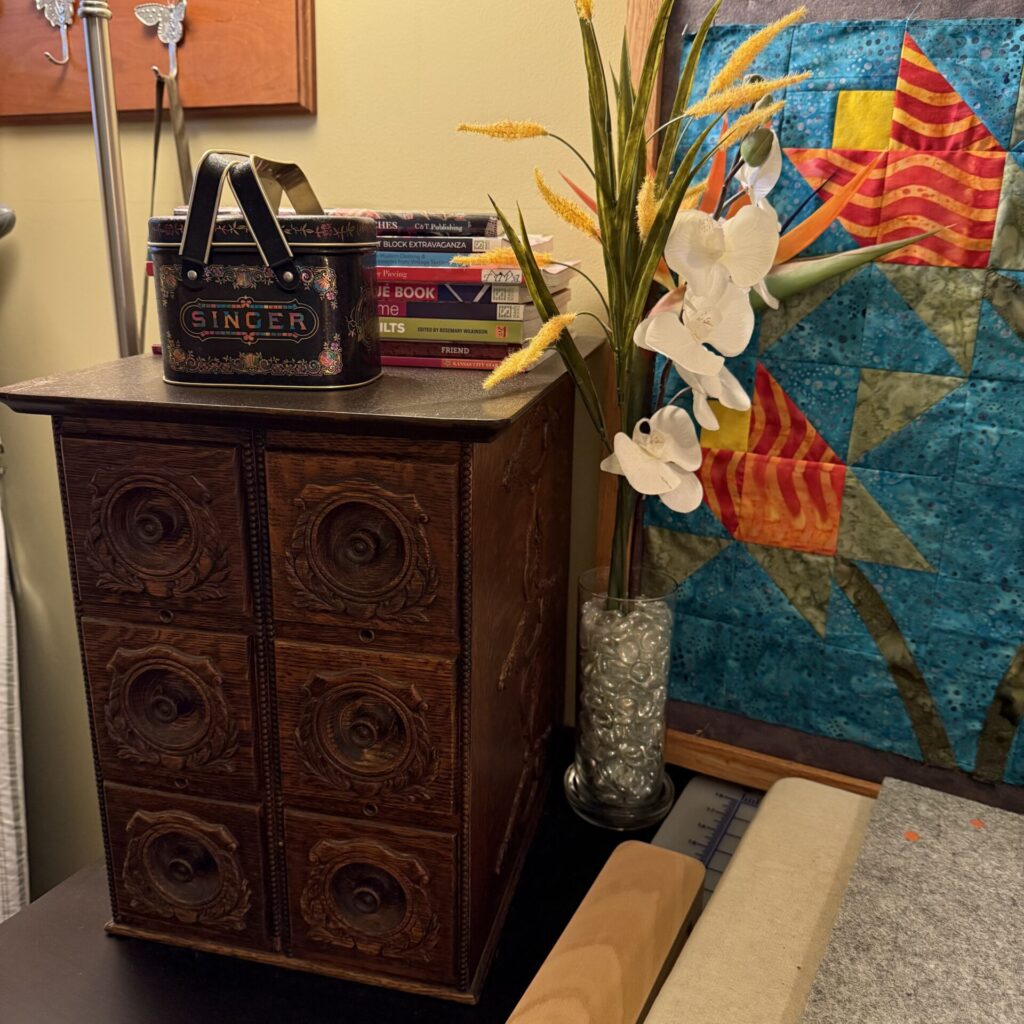
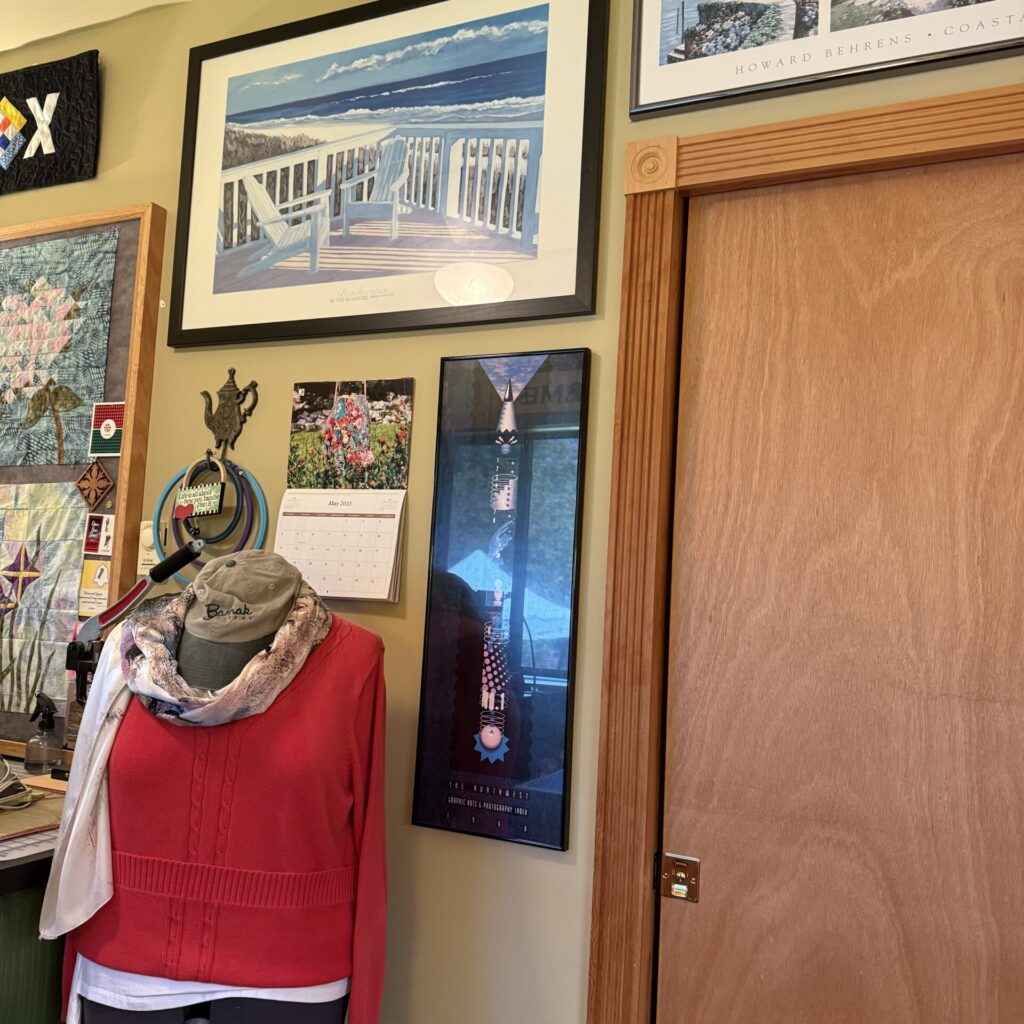
Finally, make your sewing space inspiring and personal. Add touches like framed artwork, plants, or a sewing-themed wall decal. Hang some of your own creative work and rotate it with other pieces once in a while.
A visually appealing space can ignite creativity and make every sewing session a pleasure. Here are a couple of examples from my own sewing space.
Organizing your sewing space involves thoughtful planning, ergonomic considerations, and practical storage solutions. When each workstation is tailored to your needs and tools are easily accessible, you save time and energy, allowing your creativity to flourish. By integrating efficient systems and maintaining an orderly environment, your sewing space can transform into a haven where ideas come to life. I pulled lots of great ideas for my space from the pages of Love Your Creative Space. It could be a helpful resource for you too.
Organizing my own sewing space is such a big deal to me that I created a whole category of storage solutions and ideas in my online shop. I thought it might be important to you too. You can find it here: Storage and Organization. As I come across practical, useful products, I’ll add them to this new section of the shop.