
One of the most exciting moments in any quilting project comes when the quilt top is finally complete. After hours, days, or even months of cutting, piecing, pressing, and sewing, your beautiful quilt is almost ready to become a finished masterpiece. Now comes an important decision. Will you quilt it yourself, or will you trust your quilt to a professional for long-arm quiling?
There isn’t a right or wrong answer. Many quilters enjoy machine quilting on their domestic sewing machines, while others appreciate the artistry, convenience, and beautiful results that a long-arm quilter can provide. Whether you’re making a treasured family heirloom, a quilt for a special occasion, or simply want to finish a large project without wrestling it through a home sewing machine, hiring a long-arm quilter can be an excellent choice.
Like any successful partnership, though, beautiful results begin with good preparation. Spending a little extra time getting your quilt ready before dropping it off will help your long-arm quilter do their best work and ensure your finished quilt looks exactly the way you imagined.
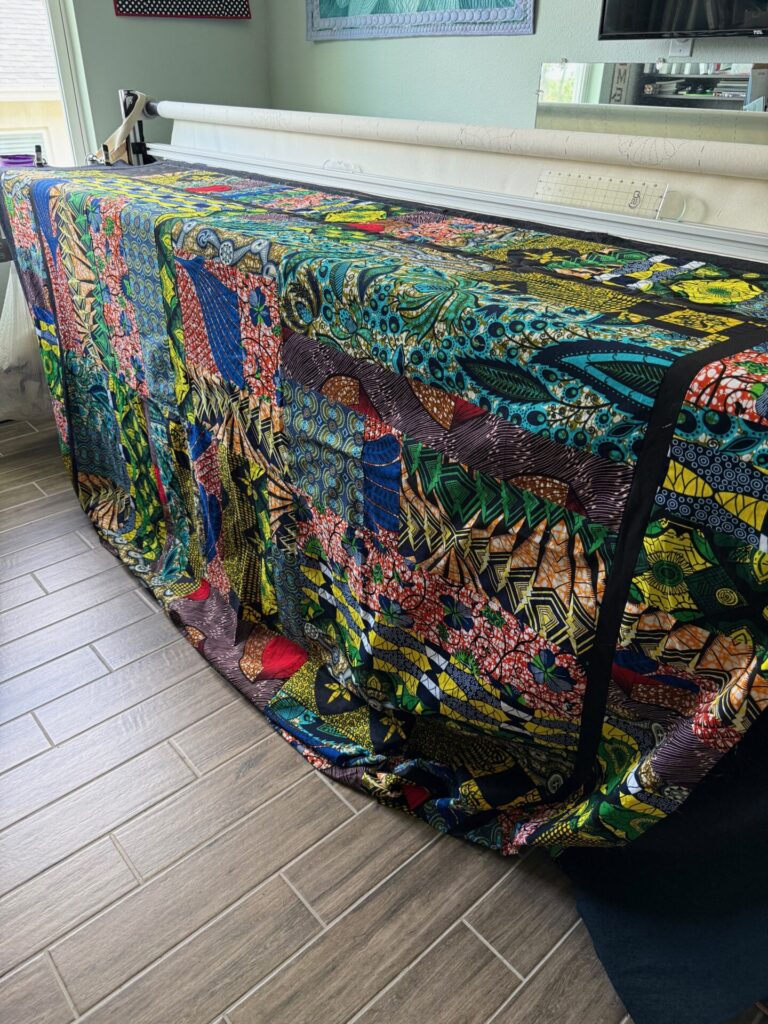
Photo Credit (all images): TKOS Quilting
Why Choose a Long-Arm Quilter?
Many quilters enjoy piecing quilts but find the quilting process intimidating, especially on larger projects. A queen-size quilt can be difficult to maneuver through the limited throat space of a domestic sewing machine, and maintaining even stitches across such a large surface can be challenging.
Professional long-arm quilters have specialized equipment designed specifically for quilting large projects. Their machines produce consistent stitches while allowing the quilt to remain flat and evenly supported throughout the quilting process.
Hiring a long-arm quilter also gives you access to hundreds of quilting designs, computerized stitching patterns, thread options, and batting choices that can enhance your finished quilt. Many long-arm quilters become creative partners, helping you select quilting motifs that beautifully complement your piecing.
For gift quilts, wedding quilts, memory quilts, and heirloom projects, the investment in professional quilting is often well worth it.
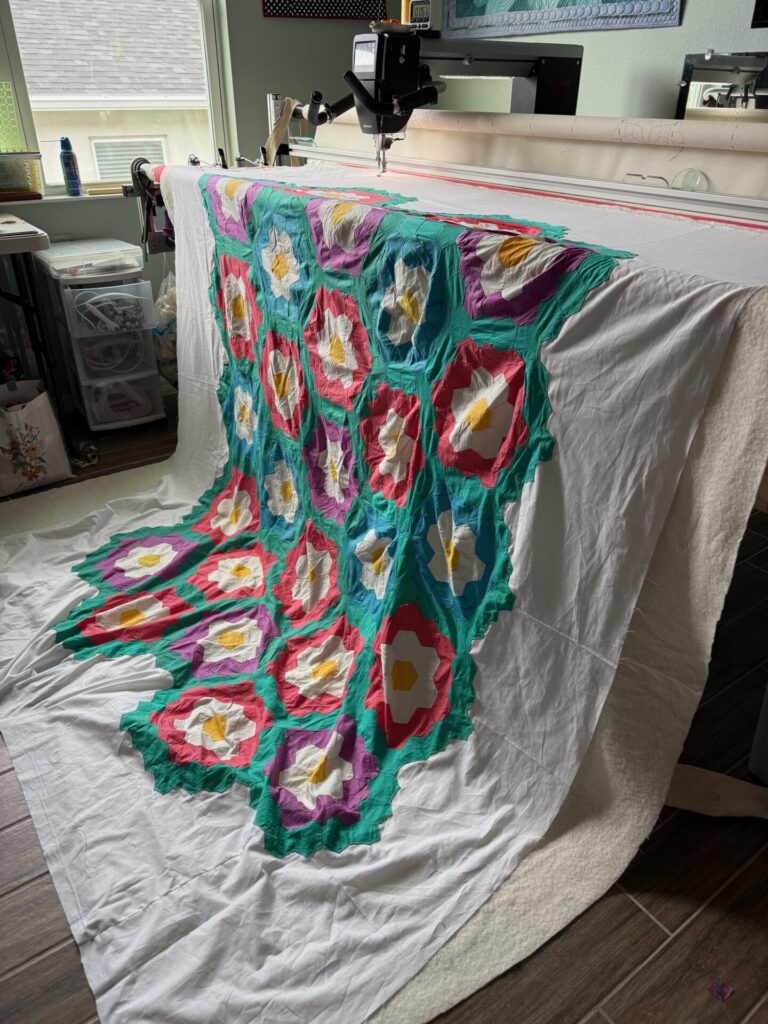
Before Long-Arm Quilting.
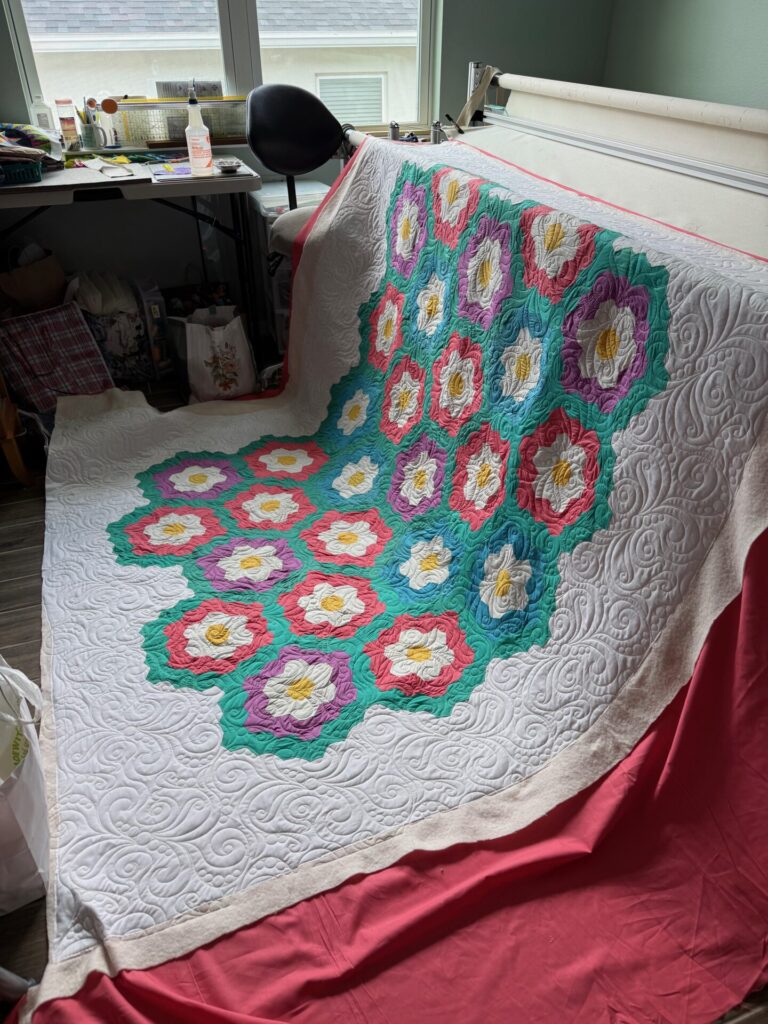
After Long Arm Quilting
Before You Schedule Your Quilt
Every long-arm quilting business operates a little differently, so it’s always a good idea to contact your quilter before finishing your project. Ask about:
- Pricing
- Current turnaround times
- Batting options
- Thread colors
- Quilting design choices
- Whether trimming and binding services are available
- Size limitations
- Backing requirements
Having these conversations ahead of time helps avoid surprises and gives you plenty of time to prepare your quilt according to your quilter’s preferences.
Make Sure You (and Your Quilt) Are Ready
Getting your project ready for long-arm quilting isn’t difficult, but these checklist items will help you get the most out of the quilting process and make working on your quilt easier for your long-arm quilter.
Preparing Your Quilt Top
Think of your quilt top as the foundation for everything that follows. The flatter and more stable it is, the smoother the quilting process will be.
Give Your Quilt a Good Press: Take time to thoroughly press the entire quilt top before bringing it to your long-arm quilter. A well-pressed quilt loads more easily on the machine and helps eliminate folds that could interfere with the quilting process.
Clip Loose Threads: Dark threads hiding behind light fabrics often become visible after quilting, especially beneath white or cream fabrics. Turn the quilt over and clip any loose threads before your appointment.
Check Your Seams: Inspect the quilt for seams that may have begun to separate or corners that weren’t completely stitched. Quilting places additional tension on the quilt, so repairing weak seams now prevents bigger problems later.
Remove All Pins: It sounds obvious, but safety pins, straight pins, and clips are occasionally forgotten. Besides being a safety hazard, they can damage needles or interrupt the quilting process.
Make Sure Your Quilt is Square: One of the most common misconceptions is that long-arm quilting can “fix” a quilt that isn’t square. Unfortunately, it can’t.
- Measure both sides of your quilt. Opposite sides should be approximately the same length, and your borders should lie flat without rippling or waving. Fullness around the edges cannot simply be quilted away and may create pleats or puckers in the finished quilt.
- If something doesn’t look quite right, it’s worth correcting before the quilt reaches the long-arm machine.
Consider Stay-Stitching the Edges: Some long-arm quilters appreciate a line of stay stitching (sometimes called a Victory Lap) approximately ⅛ inch from the outer edge of the quilt. This helps stabilize seams and prevents edge pieces from stretching during handling. Ask your quilter whether they recommend this step.
Save Embellishments for Last: Buttons, charms, beads, crystals, and other decorative embellishments should usually be added after quilting is complete. These items can interfere with the quilting machine and may even damage equipment.
Preparing the Quilt Backing: Preparing the backing properly is just as important as preparing the quilt top. The backing needs to be larger than the quilt top:
- Long-arm machines require extra fabric around all four sides so the backing can be attached securely to the frame.
- Most long-arm quilters request that the backing be at least 4 inches larger than the quilt top on every side. For example, if your quilt top measures 60″ × 72″, your backing should measure approximately 68″ × 80″. Some quilters prefer even more, so always ask before cutting your backing.
Square the Backing: Just like the quilt top, the backing should be pressed, squared, and free of wrinkles before delivery.
Remove Selvages: If your backing is pieced from yardage, trim away the selvages before sewing the sections together. Selvages are woven differently than the rest of the fabric and can create puckers or uneven tension.
Press the Seams: Neatly pressed seams create a smoother backing and make loading the quilt much easier.
Mark the Top: If your backing fabric has a directional print, attach a small safety pin labeled “Top.” This simple step helps ensure the backing is loaded in the correct orientation.
Batting Options: Some long-arm quilting businesses ask customers to provide their own batting, while others stock a variety of batting options for purchase. Common choices include:
- 100% cotton
- Cotton/polyester blends
- Wool
- Bamboo
- Polyester
Each type offers a different look and feel, so ask your long-arm quilter which batting will best complement your project and quilting design.
What Should You Bring to Your Appointment?
Before heading to your appointment, gather everything together. Bring:
- Your finished quilt top
- Prepared quilt backing
- Batting (if you’re supplying your own)
- Design inspiration or quilting ideas
- Thread color preferences
- Pattern or photo, if it helps explain your vision
- Any deadline information for gifts or special occasions
Being organized makes the consultation easier for both you and your long-arm quilter.
Frequently Asked Questions
Can a long-arm quilter fix a quilt that isn’t square? Not usually. Minor adjustments may be possible, but fullness, wavy borders, or excess fabric cannot simply be quilted flat. It’s better to correct those issues before sending your quilt for long-arming.
Should I wash my quilt before quilting? Generally, no. If prewashing is important to you, it’s better to prewash the fabrics before you cut them and piece them into your quilt top.
Can my backing be pieced? Absolutely. Pieced backings are very common. Just be sure they’re square, securely sewn, and large enough for your quilter’s requirements.
Can I use flannel or Minky for the backing? In most cases, yes. Flannel backings are popular for cozy quilts, although they may require slightly different handling during quilting.
Do I have to buy batting from my long-arm quilter? Not necessarily. Some businesses require customers to purchase batting from them, while others welcome customer-supplied batting. Ask before your appointment.
Can my quilt include buttons or embellishments? Those decorative touches are usually added after quilting is complete.
How long does long-arm quilting take? Turnaround times vary widely depending on the season, the complexity of the quilting design, and the quilter’s workload. During busy times of year, such as before the holidays or quilt show season, wait times may be longer.
How much does professional quilting cost? Most long-arm quilters charge by the square inch. Edge-to-edge quilting is generally the most economical option, while custom quilting requires more time and is priced accordingly.
A Conversation With One of My Favorite Long-Arm Quilters
Over the years, I’ve received so many questions about working with a long-arm quilter, and I thought it would be useful to ask those questions directly. Teresa Koster (TKOS Quilting) has been quilting many of my quilts for years. She was formerly based in the Beaverton/Tigard area here in Oregon and now resides and works in Mascotte, Florida. Do I still send some of my quilts to her – clear across the country? Absolutely, yes, I do. I’ll talk more about that in a minute.
I posed the following questions to her, and Teresa had lots of information to share.
Why does the pieced backing need to be loaded onto the long arm with the seam parallel to the long-arm rollers?
Because the seam only hits the long arm roller in one place, evenly across the surface of the quilt if it’s horizontal to the roller. If it’s run the other direction, that seam stacks up on top of itself over and over. Each time it goes around the roller, it gets thicker and thicker. That causes sagging in the rest of the quilt backing, and it can create pleats in the back that I don’t see when I’m quilting from the top.
I do have ways of working around that if someone is set on having the pieced backing run from the top of the quilt to the bottom.
What if I want my pieced back to run top to bottom rather than side to side? Is there a workaround?
There are a couple of solutions I’ve learned to deal with this issue.
[1] Choose a quilting design that “reads” the same from any direction and load the quilt sideways.
[2] If the quilt requires a directional stitching design, I use a narrow strip of batting and tuck it into the roller on either side of the piecing in the backing. This evens out the backing and helps prevent the sagging issue. As I more forward with the stitching of the design – I move the strips of batting as needed.
[3] If the quilt calls for custom quilting, the direction of the back doesn’t matter as much because I’m moving the machine all over the stitching area in lots of directions and quilting one section at a time.
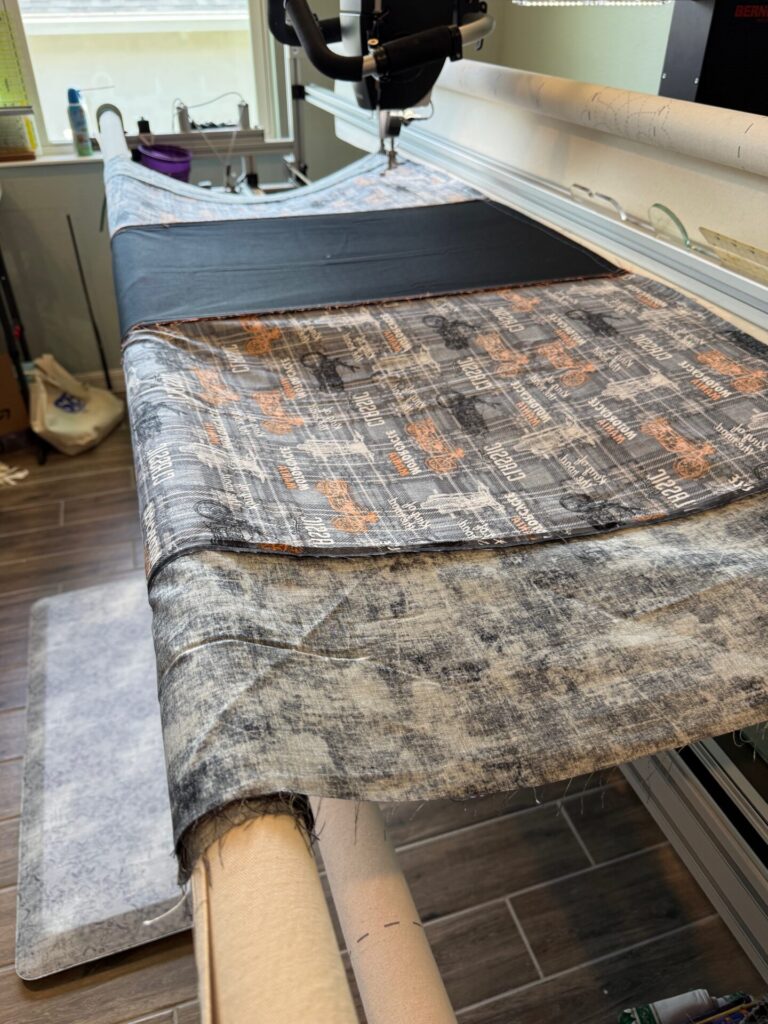
Why does my backing fabric need to be so much larger than my quilt top?
I think the most important thing is to have the back big enough, you know, so that you have plenty of room to work with. I ask people to do a minimum of 6 inches bigger than the top, which gives me 3 inches. So anything above 3 inches is a blessing. I can work with 3 inches (but would prefer 4).
Those extra inches allow us to attach the quilt securely to the frame without risking damage to your quilt top.
If I am mailing my quilt top to you, how should I package it so that it arrives safely? (Insurance – Tracking?)
I recommend putting the quilt top and back in a sealed plastic bag to protect them inside the box during shipping. This is helpful in case another package leaks during the shipping journey.
Insurance: Most shipping companies include $100.00 worth of insurance for not extra charge. If you aren’t comfortable with that amount, purchasing extra insurance isn’t expensive.
Packaging: Package your top and backing so they fit in the smallest box size (within reason). This will save you a few dollars in shipping costs.
Why should I stitch around the outside edge of the quilt before I send it for long-arming?
A stitching (or victory) lap around the edge of your quilt top can be very helpful if:
[1] The edges of your quilt top contain bias edges.
[2] Your quilt top has lots of seams right on the edge. When I stretch your quilt out and smooth it out if they’re going pull apart. That “victory lap” around the edge of the quilt top prevents those seams from pulling open.
When I lay out the quilt top on the long arm, I carefully smooth it out and baste the edges before I ever start stitching the design.
How do I choose the quilting design, quilting density, and the thread color?
When a client brings a quilt top to me, I always ask them how they plan to use the quilt and whether they have a specific quilting design in mind. Some people know exactly what they want for their quilt; most people aren’t quite sure and are looking for guidance. After I have an opportunity to look at the quilt top, I can pull several designs from my library and show them to the client. We use that as a starting place to narrow down the choices and select the perfect design for that project.
I do the same thing when offering choices of thread color. I’ll pull out several options and lay them across the top of the quilt so the client can see how each thread plays with the fabrics they’ve used in the quilt top.
For clients who have mailed me their quilts, I do the same thing but take pictures and send them by text so the client can choose.
One of the reasons I ask about the use of a quilt once it’s done is that it impacts how densely it should be quilted. Wall quilts, table runners, and pillows can be quilted very densely because they won’t be handled in the same way as a quilt. I recommend talking to your long-arm quilter about the scale of the stitching design you choose, because that can impact the drape and feel of your finished project.
How much time should I allow for the long-arm quilting process?
Each long-armer runs their business differently. I aim for a quilt to be in my possession for no more than a month. I work on a first-in, first-out basis.
The exception to that might be if a customer contacts me ahead of time and lets me know they have a quilt they need to have back in their hands by a certain date (for a wedding or some other special occasion, for example). I will try to accommodate that if I can.
Do I need to send the batting, or can I get the batting from the long-arm quilter?
I’m happy to work with the batting a customer provides – provided it is large enough for the project. You will need to purchase a larger batting than you might actually need for the finished size of the quilt – because of the long-arm process. A batting that’s exactly the size of the quilt top will probably shift as it moves through the roller.
A better option is to purchase your batting from the long-arm quilter you use. Most of us purchase batting on huge rolls so we don’t have to worry about having a large enough surface area. I charge only for the square inches that your quilt takes up. This makes it a very economical option (even more so if you are shipping your quilt to a long-armer).
What is the difference between edge-to-edge and custom quilting?
Edge-to-edge is the same stitching design row after row, covering the entire surface of the quilt. Here are a couple of examples of edge-to-edge quilting.
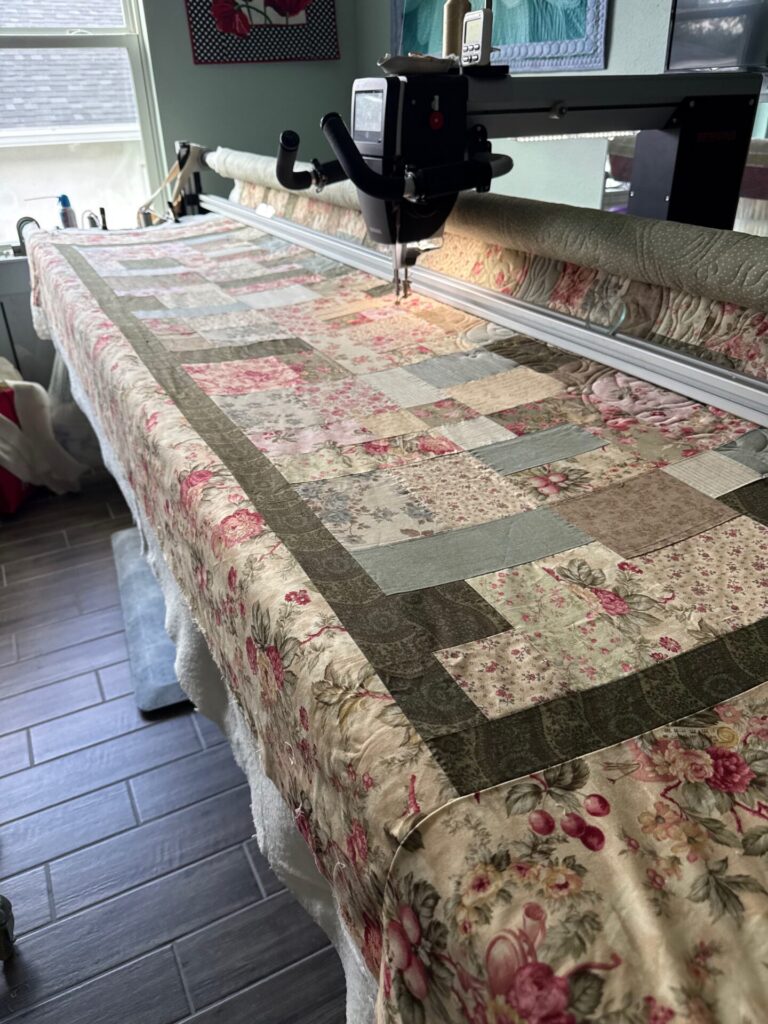
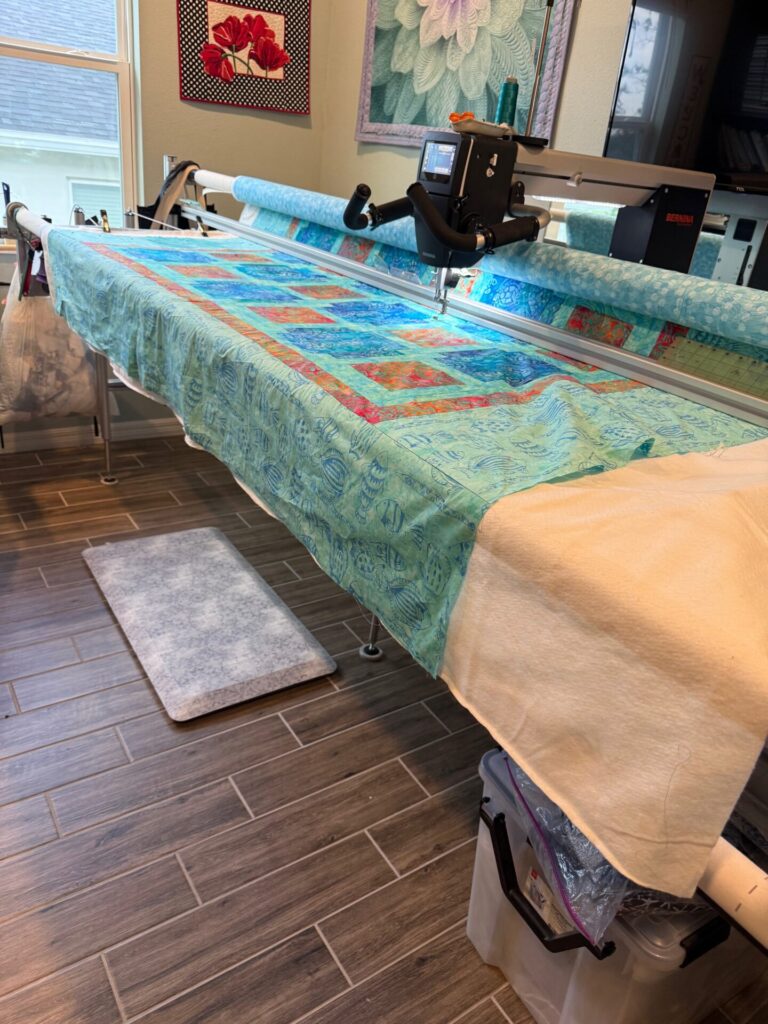
Custom quilting is created section by section based on the design of the quilt. It’s perfect for those very special quilts that need something more than a single stitching design. Because of the design time and extra stitching time involved with customer quilt, you can expect to pay a higher price. For some quilts – it’s worth the investment. Here are a couple of images that feature customer quilting. See the difference?
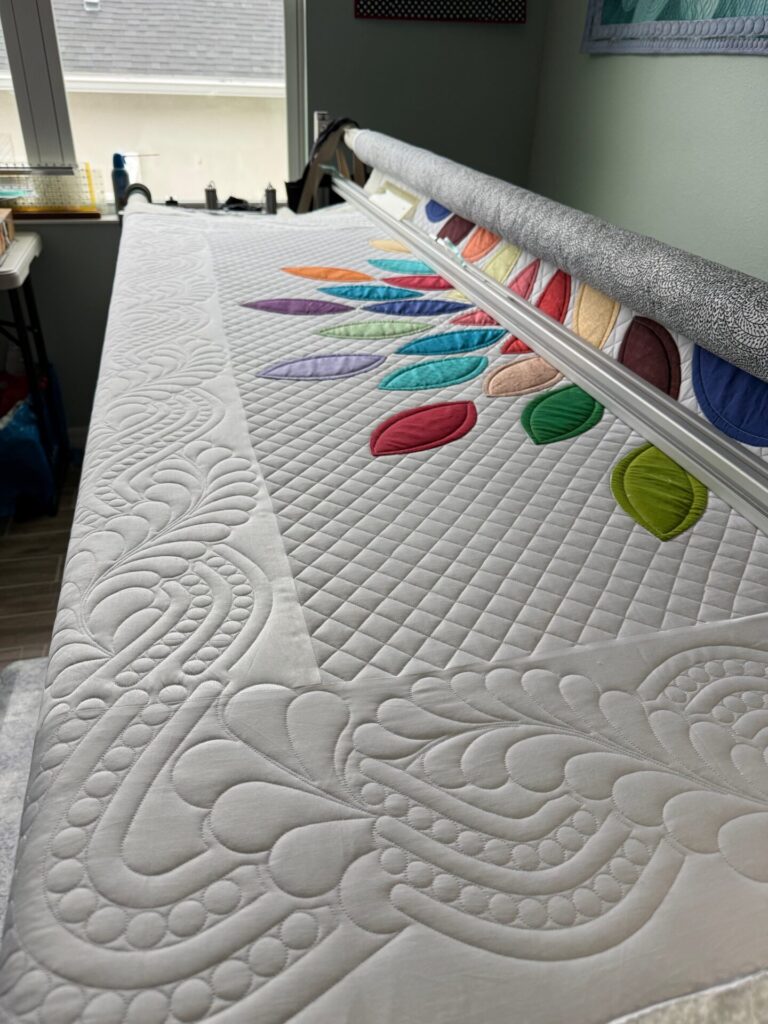
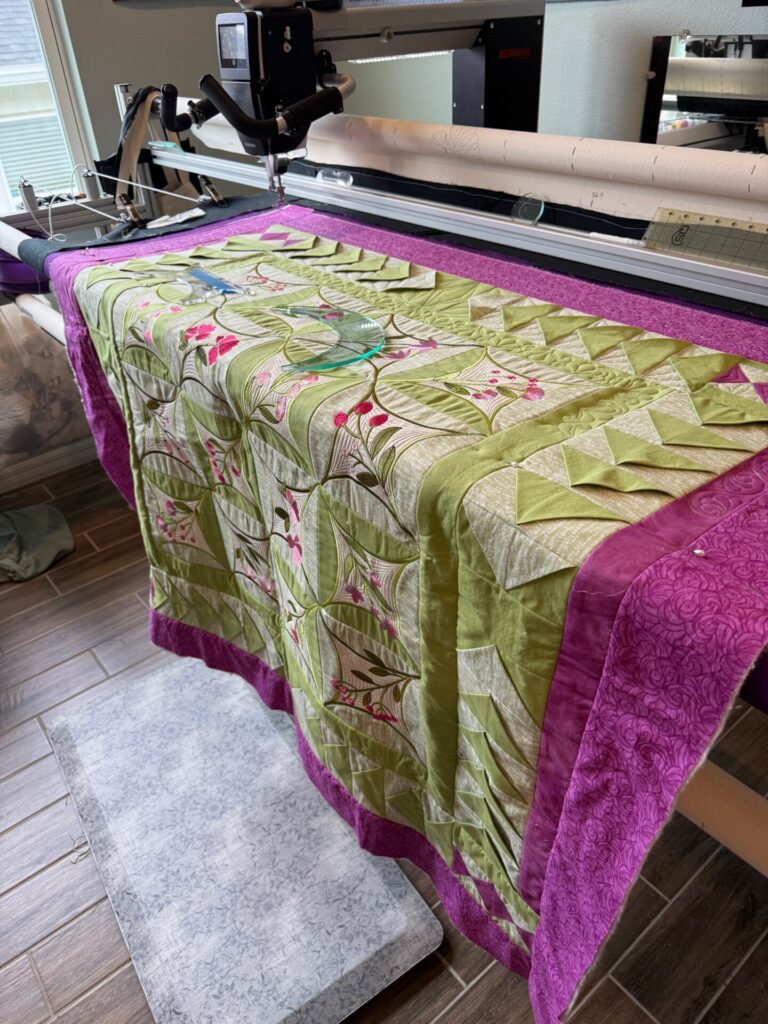
How do long-arm quilters typically calculate the cost of a quilt project?
Long-arm pricing takes into account several factors:
The square inches of your quilt top (Width x Height = Total Inches). Example: a 48” x 60” baby quilt would be 2,880 square inches.
The number of square inches is then applied to the price per inch that the long-armer charges for either Edge-to-Edge or custom quilting.
Batting – if it is purchased from the long-armer.
Thread charge. I charge by the number of bobbins I use in a project.
Connect with TKOS Quilting:
Facebook: TKOS Quilting
Print out: The TKOS Brochure and Guide to Long Arm Quilting
A Few Words About Why I Mail My Quilts to a Long-Arm Quilter
I know that many of you would never consider packing up your quilt top and the backing and shipping it across the country. I do it all the time. Here are a couple of reasons why:
Three times, I have developed a great relationship with a local long-arm quilter, and three times, that long-arm quilter has relocated to some other part of the country. I finally decided that I was so comfortable working with them that it was easier to figure out the logistics of shipping back and forth. I always include extra insurance and package my quilts carefully, using the package tracking option, both ways.
Because I design quilts for patterns and magazines, I work with long-arm quilters and quilt shops all over the country. Creating a process that works has been a very important part of my business. To date, I have shipped dozens of my quilts back and forth to every part of the country, so far, without a single problem. Does that mean it will never happen? Nope – but that’s what insurance is for.
If you find and develop a great working relationship with a long-arm quilter who is local to you – awesome! There are so many wonderful long-arm quilters in my area – and yours. I recommend, finding a couple of different people so you have options when you need them
A Partnership that Brings Your Quilt To Life
Long-arm quilting isn’t simply paying someone else to finish your quilt. It’s partnering with another skilled craftsperson who shares your goal of creating something beautiful.
Taking the time to prepare your quilt carefully allows your long-arm quilter to focus on what they do best: adding texture, movement, and artistry that enhances every stitch you’ve already sewn.
Every long-arm quilter has their own preferred methods, so don’t hesitate to ask questions before your appointment. Good communication, thoughtful preparation, and a little attention to detail will help ensure your finished quilt is one you’ll treasure for years to come.
After all, you’ve already invested your creativity, time, and heart into making the quilt. Preparing it well for quilting is simply the final step in helping it become the beautiful, finished project you envisioned from the very beginning.
Happy Stitching!