Every quilt deserves a beautiful finish. Whether you’ve spent an afternoon making a simple table runner or months piecing a king-size quilt, the quilt binding is the final detail that protects your quilt and gives it a polished appearance.
While binding may seem like one of the last steps in the quilting process, it’s actually worth thinking about before you ever make your first cut. The type of binding you choose affects not only how your quilt looks, but also how well it wears over time.
Most quilts are finished with either straight-cut binding or bias-cut binding. Both create beautiful results, but each has advantages depending on the project you’re making.
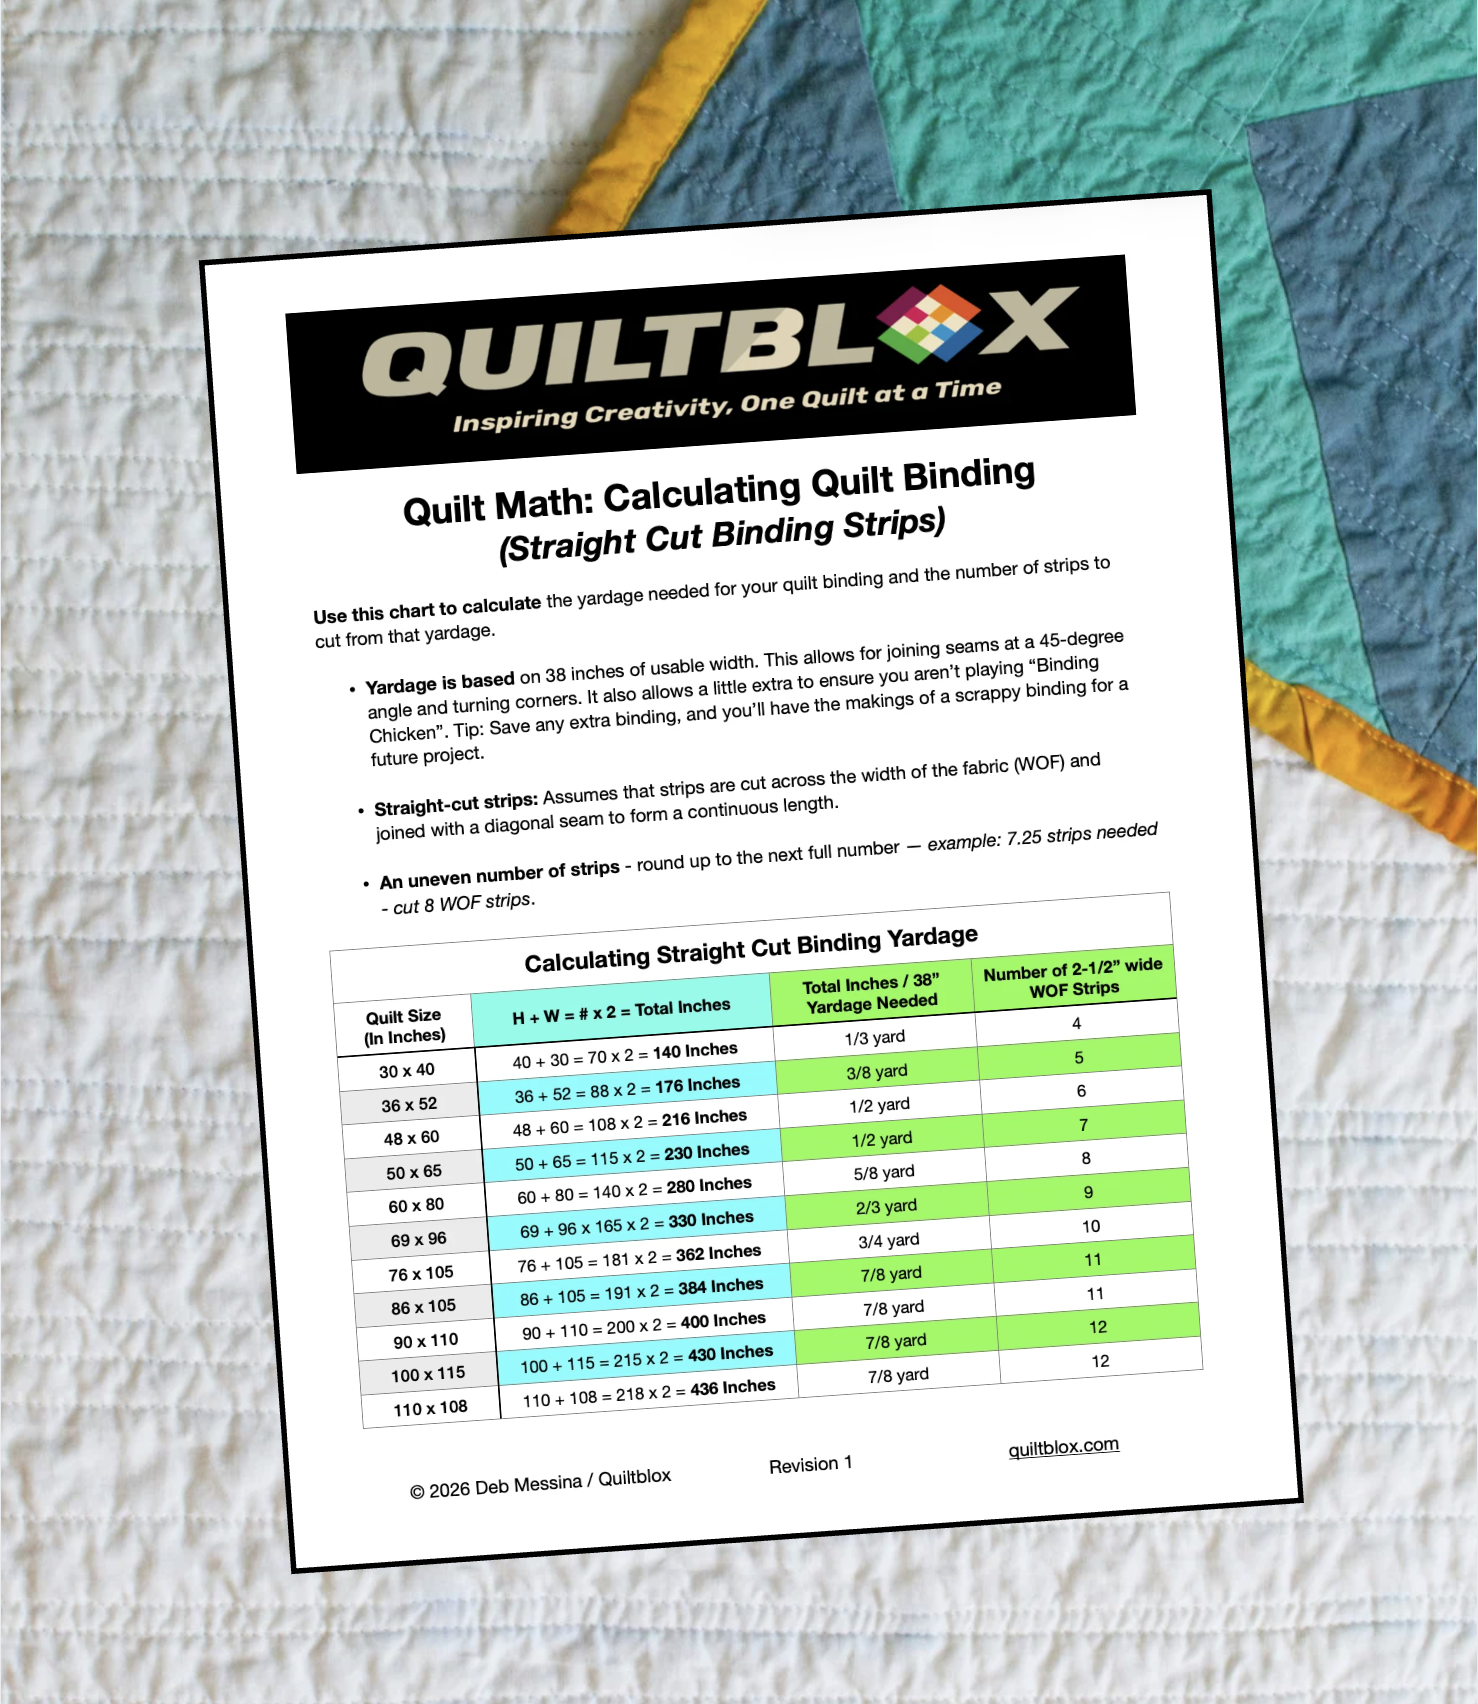
Today, we’ll look at when each type of binding works best, how to calculate the amount of binding you’ll need, and how to determine exactly how much fabric to purchase. I’ve also included a Quilt Math chart (for straight-cut binding) you can download and keep beside your sewing machine whenever you’re ready to finish your next project. The Quilt Math Chart for Continuous Bias Binding will be available in a couple of weeks.
Why Every Quilt Needs Binding
Binding serves two important purposes.
- First, it encloses the raw edges of the quilt sandwich, protecting them from wear and preventing the layers from separating over time.
- Second, it frames the quilt. Just like a picture frame enhances artwork, the binding completes the design. It can blend quietly into the quilt or become an accent that draws attention to the edge.
Because binding receives the most handling, choosing the appropriate type helps ensure your quilt lasts for many years.
Straight-Cut Binding
Straight-cut binding is cut parallel to the selvage (lengthwise grain) or across the width of the fabric (crosswise grain). Most quilters use strips cut across the width of quilting cotton because it makes efficient use of fabric and is quick to prepare.
Best for:
- Square quilts
- Rectangular quilts
- Table runners
- Placemats
- Wall hangings
- Baby quilts with square corners
- Everyday quilts
Advantages
- Uses less fabric
- Fastest to cut
- Easier to calculate
- Produces very little waste
- Plenty durable for most quilts
Limitations
- Straight-grain binding doesn’t stretch very much, making it difficult to ease smoothly around curves or scalloped edges.
Bias-Cut Binding
Bias binding is cut at a 45-degree angle to the fabric’s grain. Because the fibers run diagonally, the binding has a natural stretch that allows it to curve smoothly without puckering.
Many experienced quilters also appreciate that the diagonal grain distributes wear differently around the quilt’s edge, making it especially durable for quilts that will be washed frequently.
Best for:
- Round quilts
- Curved edges
- Scalloped borders
- Cathedral Window quilts
- Decorative projects with shaped edges
- Heirloom quilts expected to receive heavy use
Advantages
- Easily curves around rounded edges
- Lies flatter on curves
- More durable over years of washing
- Often considered the premium choice for heirloom quilts
Limitations
- Uses more fabric
- Requires additional cutting
- Produces more waste
- Takes longer to prepare
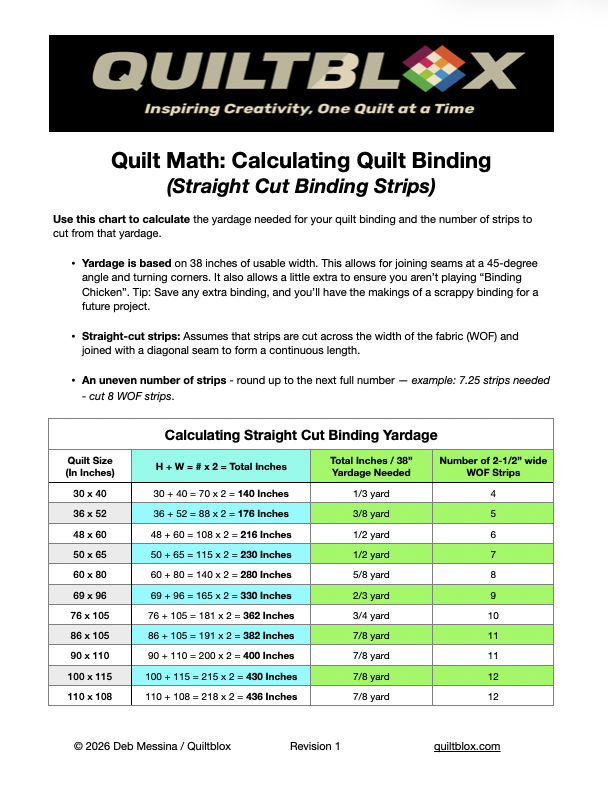
I’ll share a Quilt Math Chart (and the process for making) Continuous Bias Binding in a couple of weeks. Let’s get started with the Quilt Math Chart for Straight Cut Binding – you can print it out below.
Frequently Asked Question:
Several of you reached out to me with a question about the Quilt Math I used to create this chart:
The question: Why didn’t I add an extra 15 – 20 inches (for joining the ends) to the total inches needed when calculating the yardage amount?
It’s because [1] I used 38″ (instead of 40″ or 42″) as the usable amount of fabric in a WOF strip and [2] I always round up to the next full strip (example: 7.25 WOF strips – rounds up to 8 WOF strips).
I find that using this logic, I have plenty of binding for my project, and I always have some left over that I save for a future scrappy binding. I do love a scrappy binding for some projects!
Looking for creative ways to finish your quilted projects? I love this step-by-step Ultimate Guide to Binding and Edge Finishing!
I hope you find this chart helpful enough to print it out and use it. In a couple of weeks, I’ll share a similar chart for making Continuous Bias Binding. In the meantime …
Happy Stitching!