… I learned the hard way. This is the second installment of my Perfect Piecing Tips. After I shared the first group of tips – I realized that was only the beginning.
When I was learning to quilt – many of these tips I didn’t know about. If I did know – I thought they were just taking up too much time. I didn’t want to slow down my process. Surely – they couldn’t make that much of a difference. Right? Wrong.
Had I not been so stubborn (and in so much of a hurry), I would have realized that these tips actually saved me time (time I would have otherwise spent seam ripping). When I started using these tips (and the ones I shared in this post) I discovered that my piecing was so much more accurate and I enjoyed the process – with a lot less seam ripping.
Teflon Pressing Sheets
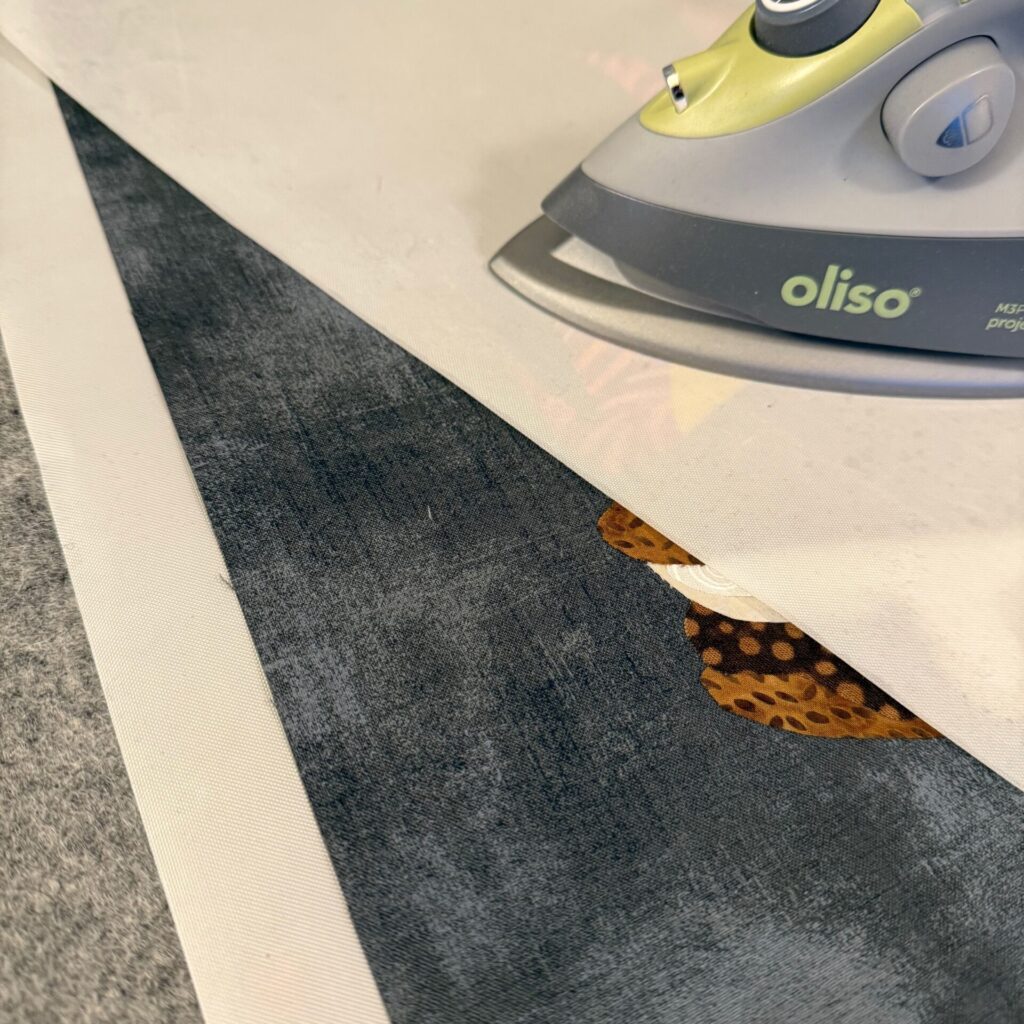
You’ve probably heard me talk about the importance of Teflon pressing sheets before. But did you know, I actually use two of them when I’m working with fusible products? I place one on the ironing surface – under my work and I place the second one on top of whatever I am fusing. Here’s why:
- The Teflon sheet under my work – protects the ironing surface – and reflects the heat back up through the fabric. This results in a nice flat fused fabric. I can also easily pick up the entire grouping of shapes and move them somewhere else if I need to.
- The Teflon sheet on top of my work – protects the iron, and still allows me to see through it enough to make certain that my pieces are correctly positioned. And the best part – no gummy residue on my iron.
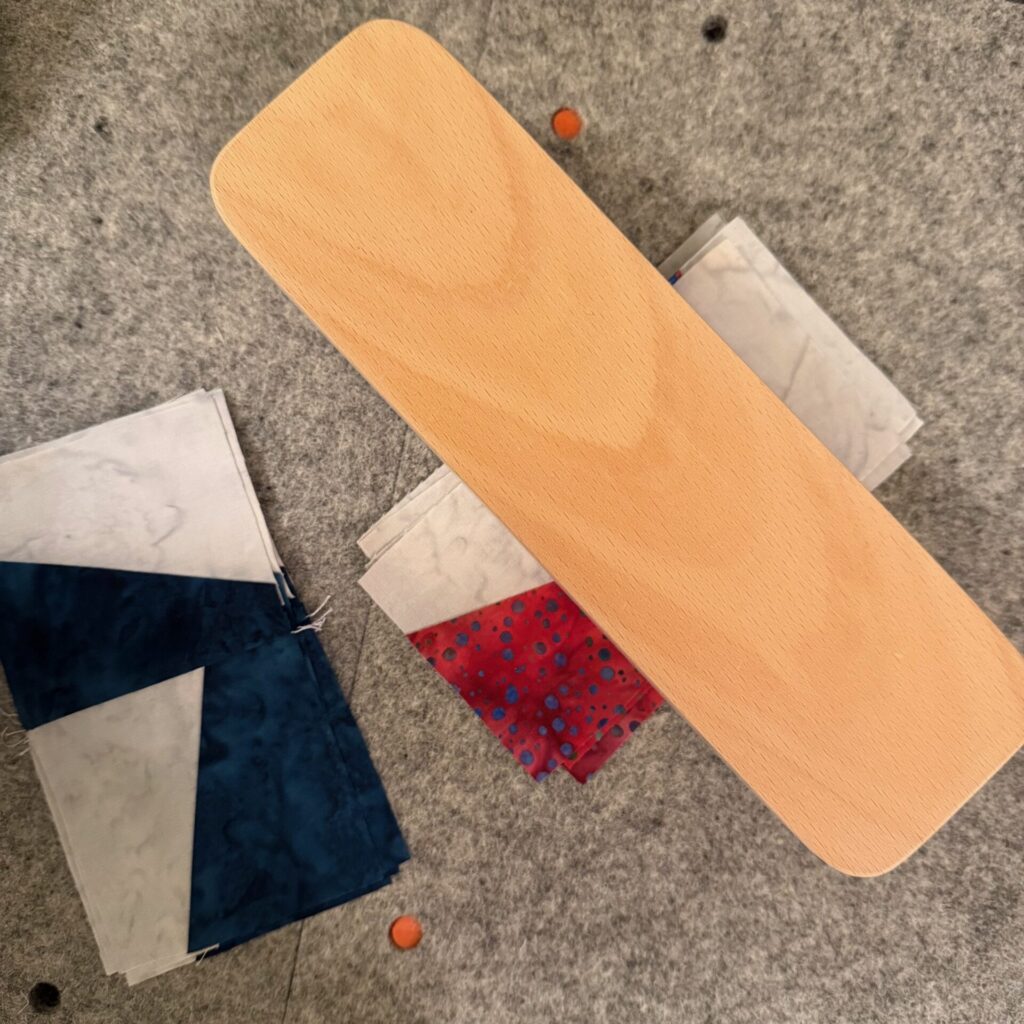
Set Seams with a Clapper
My grandmother was VERY particular about her ironing. She used all kinds of pressing devices – including a clapper. Little did I know that all these years later – I would be using a clapper nearly every day. Why?
- Placing the clapper on a freshly pressed seam while it’s still hot, sets the seam and makes it quite a bit flatter than not using the clapper.
- Flatter seams in pieced blocks help them to join together more accurately.
- It’s also easier to trim a very flat block to size – with much better accuracy.
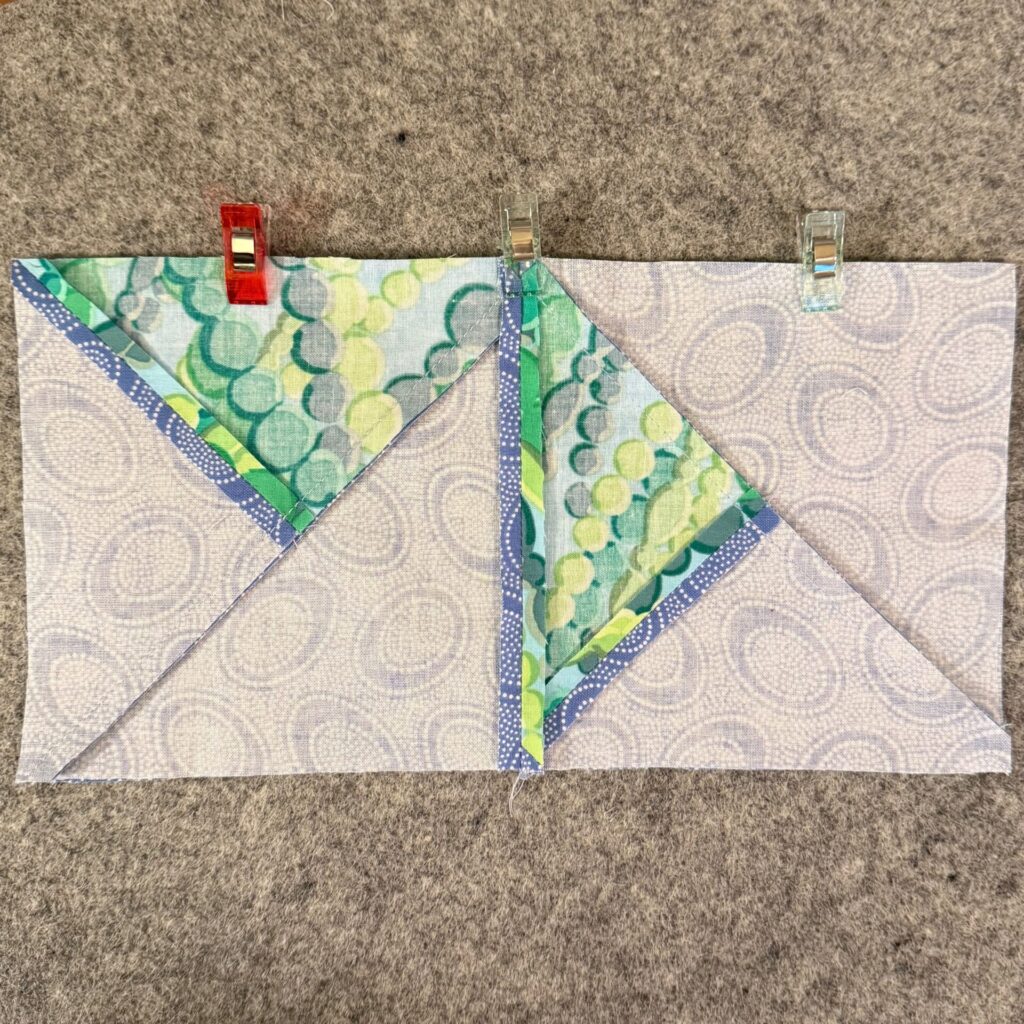
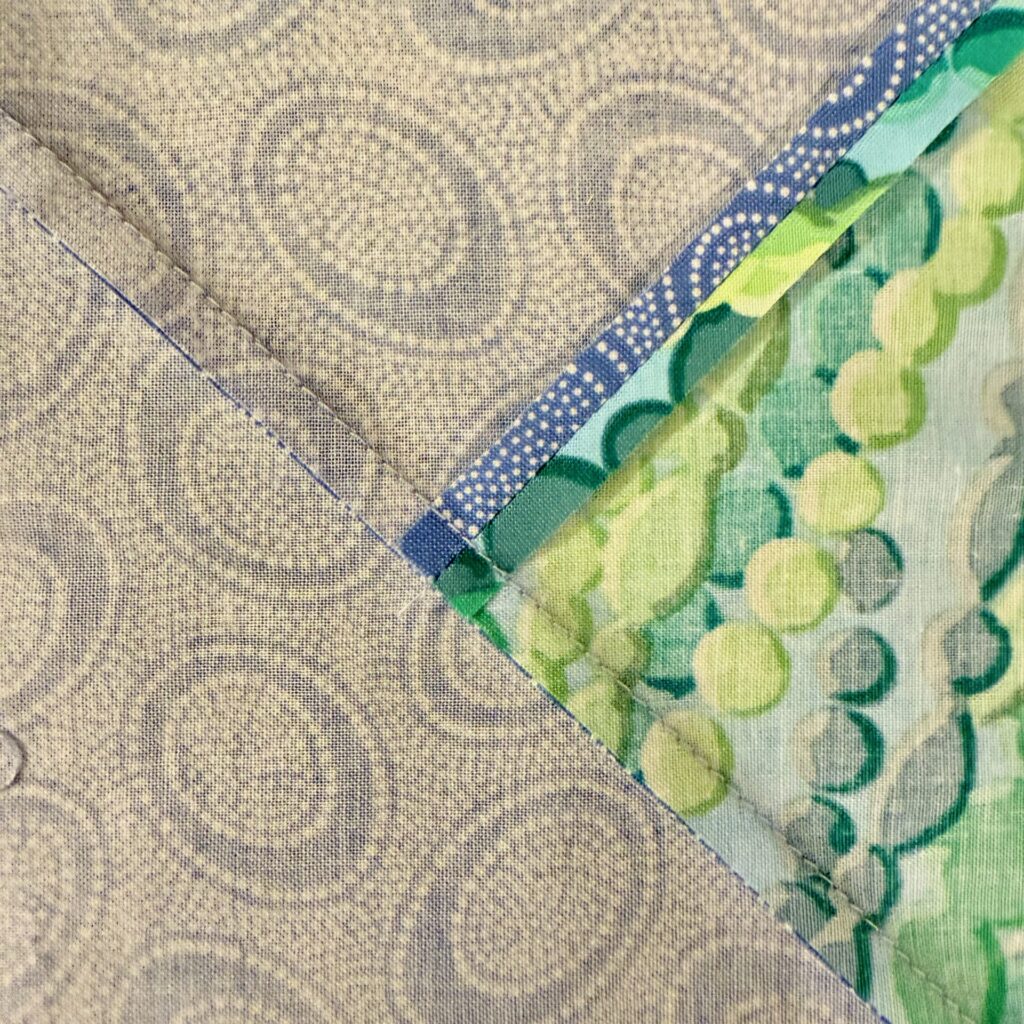
Perfect Points with Nested Seams
Have you ever struggled with getting the seams of a block to match up with the next block? Yeah, me too. There’s a trick to it; it’s called nesting the seams. It does take a bit of practice, lining up those two seams and gently wiggling them back and forth until you can feel them drop into place next to each other. It’s important to note – that to “nest” the seam – they must be pressed in opposite directions.
You’ll notice in the picture below, that the seams have been pressed in opposite directions. When the raised / folded edge of each seam is sitting right next to each other (no gaps, and no overlap) – you’ve got it correctly positioned. Secure that nested point with a quilt clip to hold it in place before you sew the seam.

Clips vs Pins
The right tool for the job – sometimes it’s clips, and sometimes it’s pins. I use both clips and pins – but honestly – if I can use a clip instead of a pin – I’m going to do that. I have poked myself more times than I could ever count, and it’s annoying.
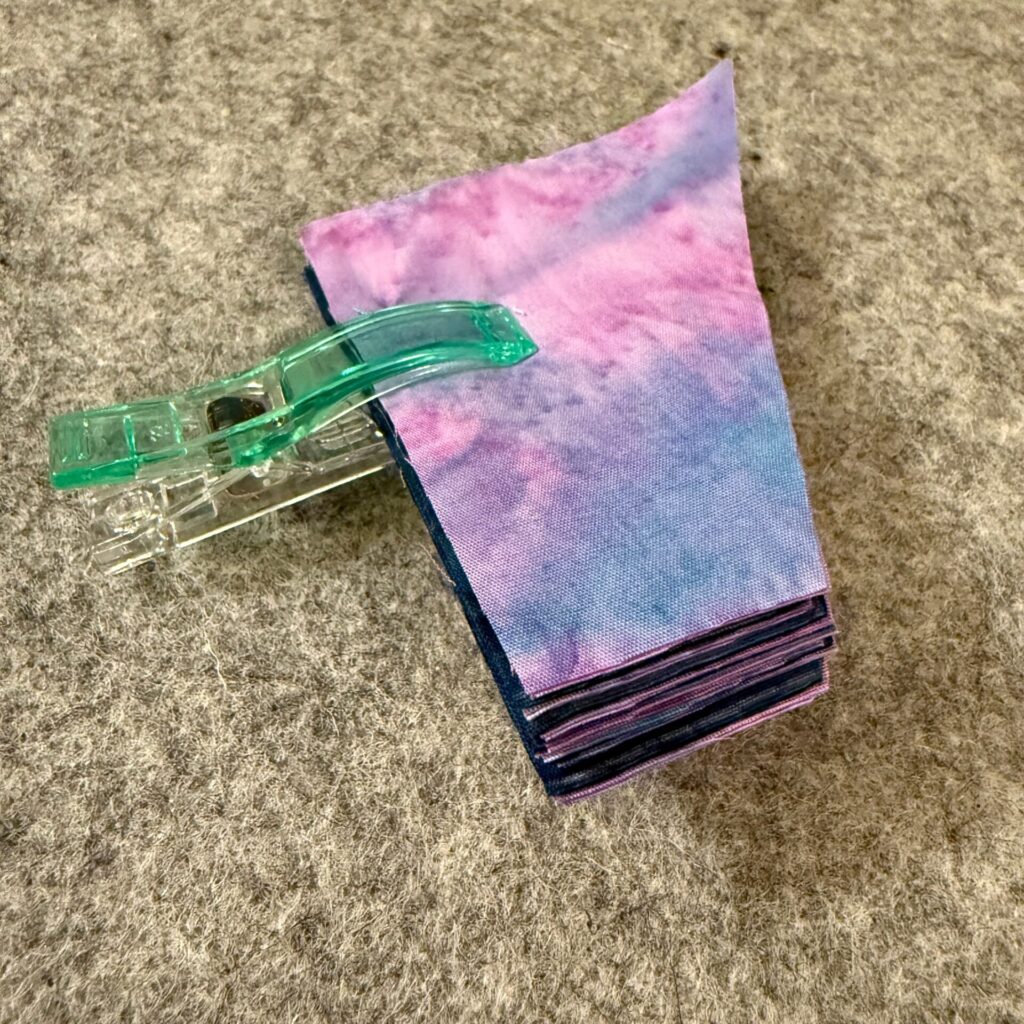
Small quilting clips: I use these little wonders every day. They are perfect for aligning seams – and holding them in place before stitching. I also use them to secure the point in a seam where I have “nested” the seam – the wider clamping area ensures that it doesn’t slip out of place.
Large quilting clips: These are the perfect clips for keeping groups of block pieces (or entire blocks) together. I use them to group the blocks in an entire row of a quilt – it keeps things in order (and that makes me happy).
Pins: I use pins any time I need to lay a ruler over the fabric to mark the fabric. These small, flat Magic Applique pins are perfect for that task.

Thread Weight Matters
Back in the day – I didn’t give thread weight any thought at all. If the thread was 100% cotton – and the right color, all was good, or so I thought at the time. In the years since, I’ve learned so much more about thread – thread weight in particular.
Thread weight is expressed in numbers 12, 30, 40, 50, 60, 80. The higher the number, the finer the thread is. For general piecing and quilting, most quilters tend to start out using a 40wt thread. It’s a great general-purpose thread weight.
A few years ago, I switched to using a 50wt thread for most of my piecing and some of my quilting. Why?
- The finer thread doesn’t take up as much room when pressing a seam to one side – this is a help if your block is right on the edge of being the correct size.
- When threading needles for hand stitching – the 50wt thread is MUCH easier to get through the tiny eye of a quilting needle.
- For quilting the project, you’ll notice from the picture below that the 40wt thread sits on top of the fabric a little more while the 50wt thread nestles down into the fibers of the fabric a little more. Sometimes, I want the quilting to be a little more prominent – sometimes, I don’t. I choose the weight of the quilting thread based on the final effect I want in my quilted project.

Pressing Seams
In my early days of quilting – I didn’t worry too much about pressing each seam as I sewed the block. I figured I would press the blocks when I had them all done. How do you think that worked out for me? The phrase “not well” is an understatement. Now – I press every single seam – before moving on to the next step. I also follow these pressing guidelines:
- If I’m following a pattern and the designer has indicated the direction to press each seam – I follow their lead. They put that information in the pattern for a reason.
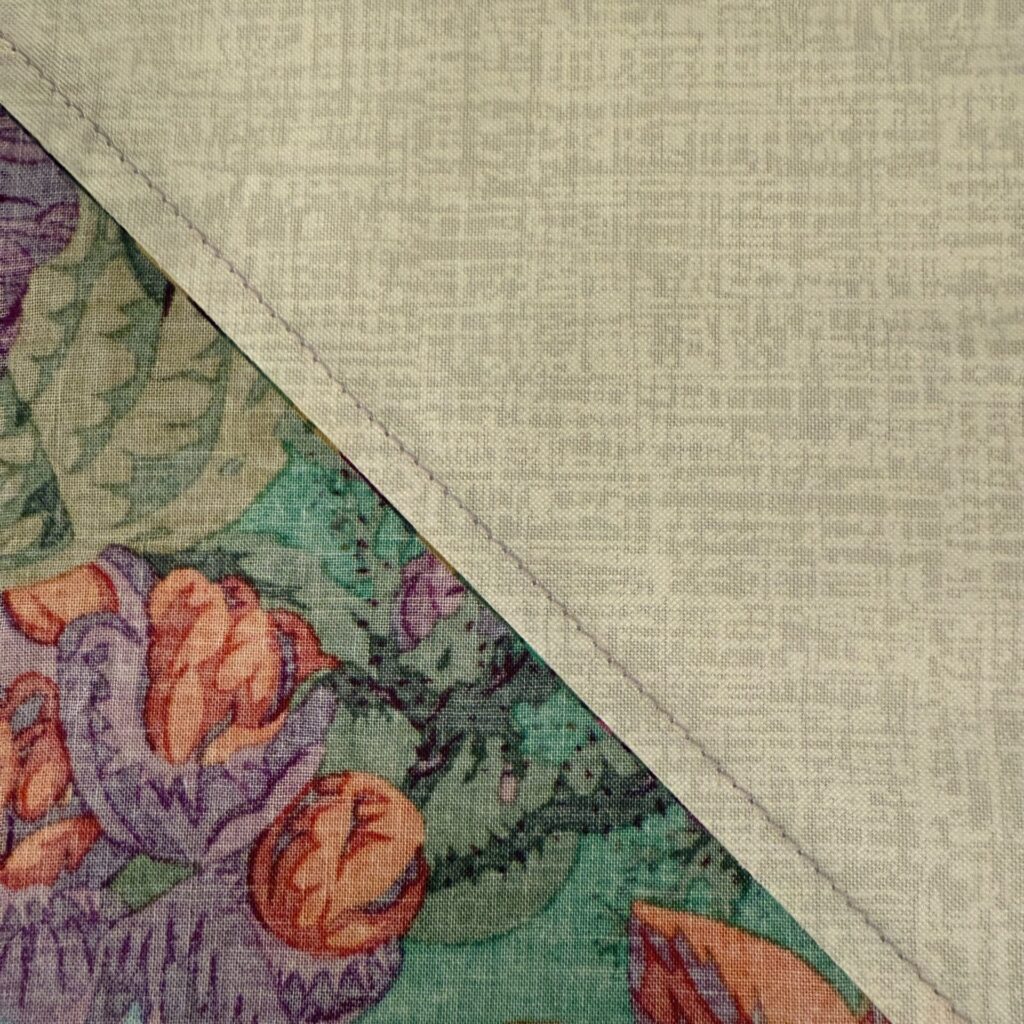
- Generally – I press each seam toward the darker fabric. This helps to hide that folded-over portion of the seam allowance so the dark fabric does not show through to the front of the quilt. If that isn’t possible because of the configuration of the block – I will press the seam open.
- Blocks with multiple fabrics joining in the center of the block (for example: 8-pointed star blocks): whenever possible – I will press these seams open to reduce the bulk.
- Joining blocks and rows: I almost always press these seams open to reduce the bulk. This is my preference – not everyone agrees – but it is very effective for me.
- There are exceptions to every “guideline”. It’s important to evaluate your block and pattern to determine if you need to make an adjustment to the pressing direction for a seam.
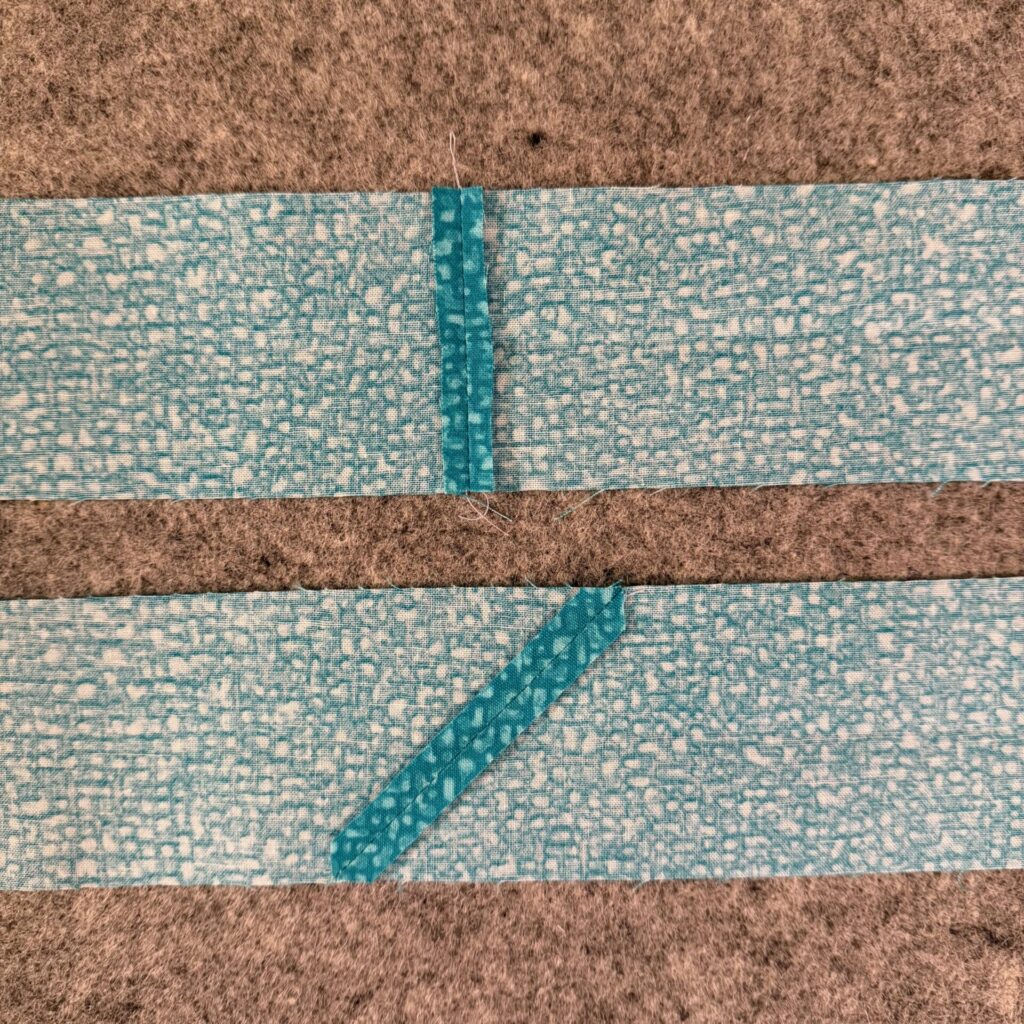
Joining Strips for Longer Lengths
Nearly any quilt project larger than a very small wall quilt – will need strips of fabric for the borders and binding that is longer than the fabric is wide (Width of Fabric). Sewing strips of fabric together to make longer strips can be accomplished with a straight seam – or 45-degree diagonal seam. I spent years using a straight seam to join fabric strips for borders and binding; it just seemed easier. Now – I almost never join strips with anything other than a 45-degree seam. Why?
- Borders: a 45-degree seam is a longer seam, and spreads any pressure on the seam across a longer area. What puts pressure on a seam? Kids, dogs, pulling on the quilt, daily use (you get the idea). It’s also (generally) less noticeable in the completed quilt.
- Binding: Using a 45-degree seam to join the fabric strips spreads out the bulk of the seam allowance over several inches – avoiding the “bump” in the binding that is noticeable in the finished quilt.

(front of the fabric).
(back of the fabric)
I hope these perfect piecing tips – and those I shared in this post, are helpful. It’s possible that as soon as I share these tips with you – I’ll come up with more tips I should have added to the list. If that happens, I’ll add them to a new post and share them with you. In the meantime – Happy Stitching!