Creating a quilt back – as special as the front of your quilt
It’s just the back of the quilt – right?
It’s just the back of the quilt – right? Not for me – I love creating “Inspiring Quilt Backs” that while simpler – relate to the front of my quilt. I want the back of my quilts to look and feel like I put as much thought into them as I did the front of my quilt. I want them to “live” as one with the front of the quilt.
What do I mean by that?
So glad you asked! If you think about how a quilt is used – don’t we see both the front – and parts of the back when it’s wrapped around a loved one, or when we’re snuggling up with it on the couch? How nice would it be if we used some of the same fabrics on the back that we used on the front?
Here’s another way to look at it
When we make a quilt, it’s a significant investment in both time – and materials. The back of the quilt needs to cover the same area as the front (a bit more actually). So – if I’m spending all that money to make the back of the quilt – why not take a few extra minutes and create a back – worthy of the front of my quilt. I’m not talking about making the back as complex as I’ve made the front, but I want it to somehow relate to the front of the quilt.
Does that mean that I need to buy enough yardage in one of the fabrics I used for the front to make up the back?
Well, – yes – and no. Depending on the size of your quilt – that could add up to a lot of yardage that might not be effectively utilized.
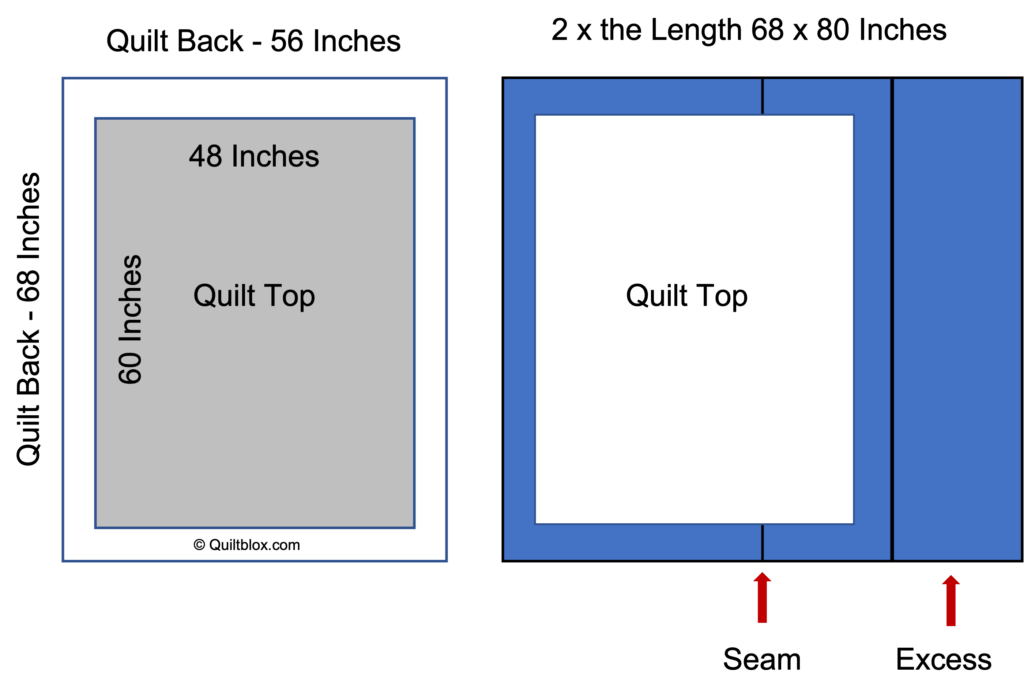
Here’s an example – let’s say that you are making a crib quilt that will measure 48” x 60” when it’s complete. Your backing should measure 56” x 68” before machine quilting – especially if you will be long-arming the quilt. The usable width of most quilting fabrics is 40 inches. In order to get enough of the same fabric to use on the back – you would need 3-3/4 yards of fabric (68” x 2 lengths of fabric) in order to make the back out of one single fabric. You would also have a LOT of extra fabric left over.

Please note – in the example above – I ran the seam the long way from the top to the bottom of the quilt. It’s possible to run the seam side to side (unless you are using a directional print for the back). The amount of fabric used would be about 1/2 Yard less – and the amount of excess fabric would be about the same.
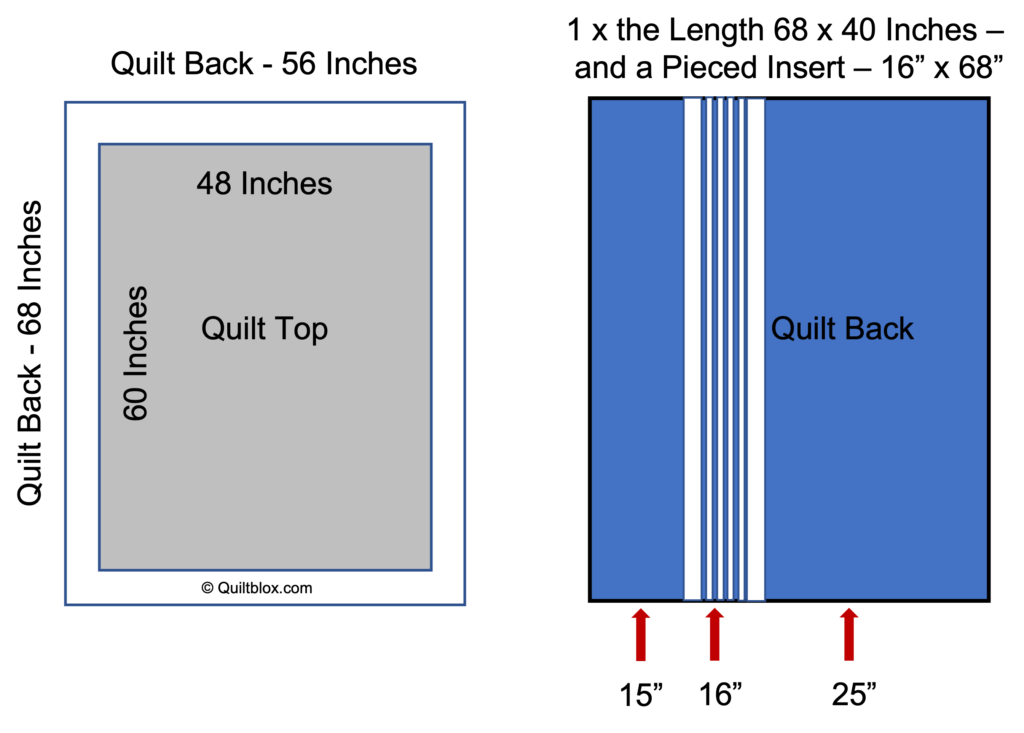
All that extra fabric may be fabulous – if you are working on building your stash – or you have another similar project planned that this fabric could work into. What if – instead – you chose to purchase one length of fabric (2 yards) for the backing and made up the rest of the area you need with fabrics from the front of the quilt?
This option not only saves money – but also makes the back of your quilt – relate to the front because you’ve used the same fabrics (using up some of your leftovers from the front in the process). Even very small scraps can be assembled into strips and used to make the back larger – and a bit more interesting.

What happens if I don’t have enough leftovers from the front?
Not a problem, this is where your creativity comes in. Adding in small amounts of other fabrics from your stash that complement the fabrics used in your quilt is perfectly fine – even if you haven’t used them on the front. I will often add in black, white, cream, gray, or some other neutral fabric if they work with my other fabrics and I need a little more than what I have left from the front. There are no rules here – it just needs to please you.
Am I really making a two-sided quilt?
Yes, as a matter of fact – you are. That doesn’t mean that the back (your second side) needs to be particularly complex – even if the front is. I like to make the backs of my quilts fairly simple – even a bit “modern” – it makes them interesting and a little more special. It’s really about effectively using the fabric you have – to cover the area you need for the back of your quilt. It doesn’t need to take much more time than simply sewing two lengths of yardage together to make a solid (one fabric) back. A little more time – but not much.
Not sure where to start?
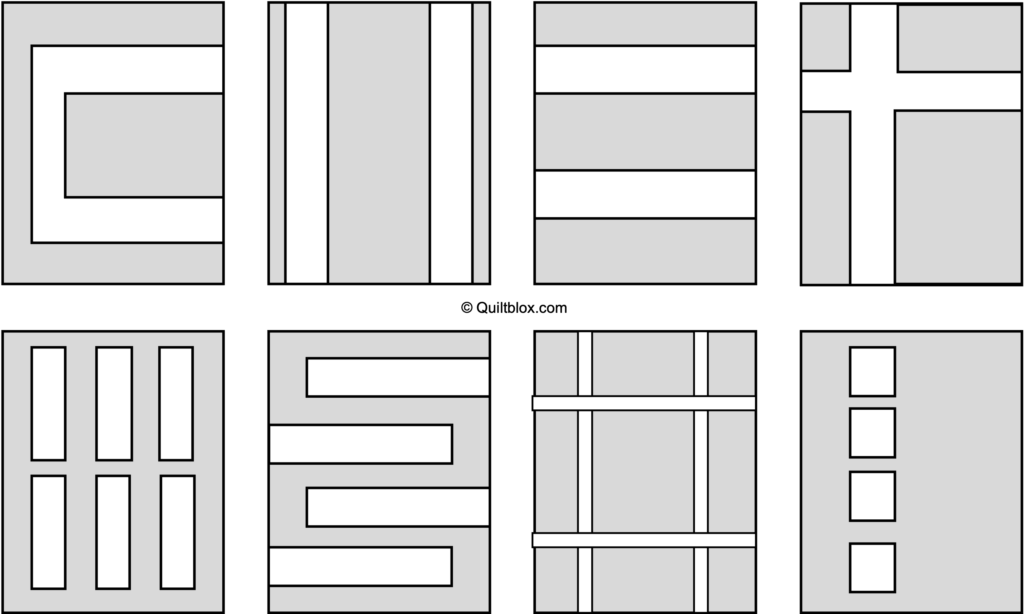
Here are a few examples to get you started. In each case – you can make the inset fabric strips wider or narrower to accommodate the size you will need for your quilt back. Your inset strips of fabric could be just that – strips. You could also use any extra blocks you have from the front or makeup entirely different blocks in the same fabrics. I’ve been known to make crazy long strips of flying geese to use as inset strips – even if I didn’t use that block on the front of the quilt.

Real-life examples
Diagrams are wonderful but it helps to see how others have taken the idea of creating an interesting back for their quilt – and run with it. I’ve created a gallery of quilts and their inspiring quilt backs – to provide a little inspiration. Some of these were made by me – and others were made by some of you (thanks so much for sharing!)
I’ll be adding to this gallery over time as I (and you) come up with new ideas for making the back of your quilt – a little bit special.
You can find the Inspiring Quilt Backs Gallery Here.
