
Have you ever carefully cut all your fabric pieces, followed the pattern instructions, and sewn your quilt blocks together, only to discover that they don’t measure what they’re supposed to? Maybe they’re a little too big, a little too small, or just different enough that getting the pieces to fit together is turning into a frustrating puzzle.
You’re certainly not alone! Accurate quilt blocks depend on more than precise cutting. The fabric itself, your seam allowance, the thread you’re using, how you guide the fabric through your sewing machine, and even the way you press your seams can influence the finished size. And here’s the tricky part: a tiny difference in one seam might not seem like much, but repeat it across a block, a row, and an entire quilt top, and those little differences can add up.
The good news is that many of these problems can be identified and corrected. Once you understand what affects the size of your quilt blocks, you can develop a few simple habits to improve your accuracy and save yourself a lot of frustration along the way. Let’s look at the common culprits, how to recognize them, and what you can do to get your quilt blocks measuring up.
1. The Quarter-Inch Seam: Small Differences, Big Consequences
Let’s start with the seam allowance. It’s one of the first things to check when your quilt blocks aren’t measuring correctly.
Most quilt blocks use a 1/4-inch seam allowance. That measurement is important because the seam allowance determines how much fabric remains visible in the finished unit. If your seam is too wide, you use up more fabric than the pattern allows. If it’s too narrow, you leave more fabric in the unit than intended.
The difference may be tiny, but the effect can accumulate quickly.
Imagine that each seam is just a little wider than it should be. A block with several seams can end up noticeably smaller than expected. Reverse the problem, and seams that are consistently too narrow can leave you with a block that’s too large. When you begin joining multiple blocks into rows and then join those rows together, the differences can become even more apparent.
What about a scant quarter-inch seam?
You’ll often hear quilters talk about sewing a scant 1/4-inch seam. A scant seam is just a little less than a true quarter inch, usually by a thread or two.
Why would you intentionally sew a seam that’s slightly narrower than 1/4 inch? When you stitch two pieces together and press the seam, the fabric folds around the stitching line. That fold takes up a little space. A scant seam can help compensate for that effect and allow the finished unit to measure as intended.
However, a scant quarter inch isn’t a universal solution. The right seam allowance depends on the pattern, fabric, thread, and construction method. The goal isn’t to sew a scant seam simply because someone recommends it. The goal is to find the seam allowance that produces accurately sized units with the materials you’re using.
How to find the right seam allowance
Before beginning a new project, sew a test unit using the same fabric and thread you’ll use for the quilt. Press it the way you normally press your block units, then measure it against the expected dimensions.
If it’s too small, your seam may be consuming too much fabric. If it’s too large, your seam may be too narrow. Make a small adjustment and test again until the finished measurement is correct.
Don’t assume your quarter-inch seam is accurate just because you’re using a quarter-inch presser foot. We’ll look at machine guides and ways to check your seam allowance in a moment.
2. Don’t Overlook Your Thread and Fabric
Here’s a detail that’s easy to miss: the thread and fabric you choose can affect the way your seams behave and the amount of bulk in your finished quilt blocks.
Thread weight makes a difference
Thread weight is worth considering, particularly when you’re piecing intricate blocks with lots of small pieces and seam intersections.
For example, 40-weight thread is generally thicker than 50-weight thread. The 50-weight thread typically creates a finer, less bulky seam, while the 40-weight thread can add more bulk. Thread construction and fiber also matter, so weight isn’t the only consideration.
That difference may not seem significant when you’re looking at a single seam. But consider what happens when you combine a thicker thread with fabric that’s on the heavier side and a seam allowance that’s already a thread or two off. The additional bulk and the way the fabric folds around the seam can affect the finished dimensions.
Now multiply that by the number of seams in a block. It’s easy to see why a combination that works well in one project might not give you quite the same results in another.
This doesn’t mean you must always use 50-weight thread for piecing or that 40-weight thread is wrong. Instead, pay attention to how your thread, fabric, and seam allowance work together. If your blocks consistently measure differently when you change thread, that’s a useful clue in your troubleshooting process.
Fabric weight and thickness matter, too
Not all quilting cottons behave exactly alike. Some are lighter and more flexible, while others are denser, heavier, or more tightly woven. Batiks, flannels, and other specialty fabrics may behave differently from the quilting cotton you use most often.
When you combine thicker fabric with a heavier thread, the seam intersections can become particularly bulky. That bulk may affect how flat the block presses and how accurately the next pieces align.
If you’re working with an unfamiliar fabric, make a sample block or test unit first. Check the finished measurement after pressing, rather than assuming the seam allowance that worked with another fabric will produce identical results.
3. Prepare Your Fabric Before Cutting
Accurate cutting starts before you pick up your rotary cutter. Fabric that isn’t lying flat can produce pieces that are different sizes, even when you’re careful with your ruler.
Start by pressing your fabric. Remove wrinkles and creases so the fabric lies smoothly on your cutting mat. Pay attention to folds that may have formed during storage, and make sure you’re not cutting through multiple layers that have shifted out of alignment.
Handle the fabric gently as you position it. Pulling, tugging, or stretching it can distort the grain, especially along bias edges. If the fabric has been folded for a long time, give it a little extra attention before cutting.
Would a spray stabilizer help?
Products such as Best Press and similar fabric sprays can give fabric a little more body and make it easier to handle. Some quilters find that treated fabric is less likely to shift while cutting and piecing.
If you use a spray product, follow the manufacturer’s directions and press the fabric as directed before cutting. Test it on a scrap first to make sure you like the result.
Remember that a stabilizer can help with handling, but it won’t correct a ruler that slips, a cutting line that’s inaccurate, or a seam allowance that’s too wide. Think of fabric preparation as one part of a larger process.
4. Make Your Sewing Machine Work for You
You don’t have to rely on guesswork to sew accurate seams. Several useful tools can help you guide the fabric consistently, but each one needs to be set up and checked properly.
A quarter-inch presser foot
A quarter-inch foot provides a convenient reference for guiding fabric through the machine. Depending on the design, the edge of the foot may align with the fabric edge when the needle is positioned to create a quarter-inch seam.
However, don’t assume every quarter-inch foot produces exactly the same result on every machine. Needle position, foot design, and the materials you’re using can affect the actual seam allowance.
Sew a test and measure the result before relying on the foot for an entire quilt.
Fabric guides
A physical fabric guide can give you a firm edge to follow while sewing. This can be especially helpful if you tend to let the fabric drift away from the intended stitching line.

Position the guide carefully, using a test seam to confirm that it produces the correct allowance. Make sure the guide doesn’t interfere with the presser foot or fabric movement.
Diagonal Seam Tape
Diagonal Seam Tape can provide visual guidelines on your machine bed. It’s particularly useful when stitching diagonally across squares, as in many half-square triangle methods, or when you want a consistent reference for aligning pieces.
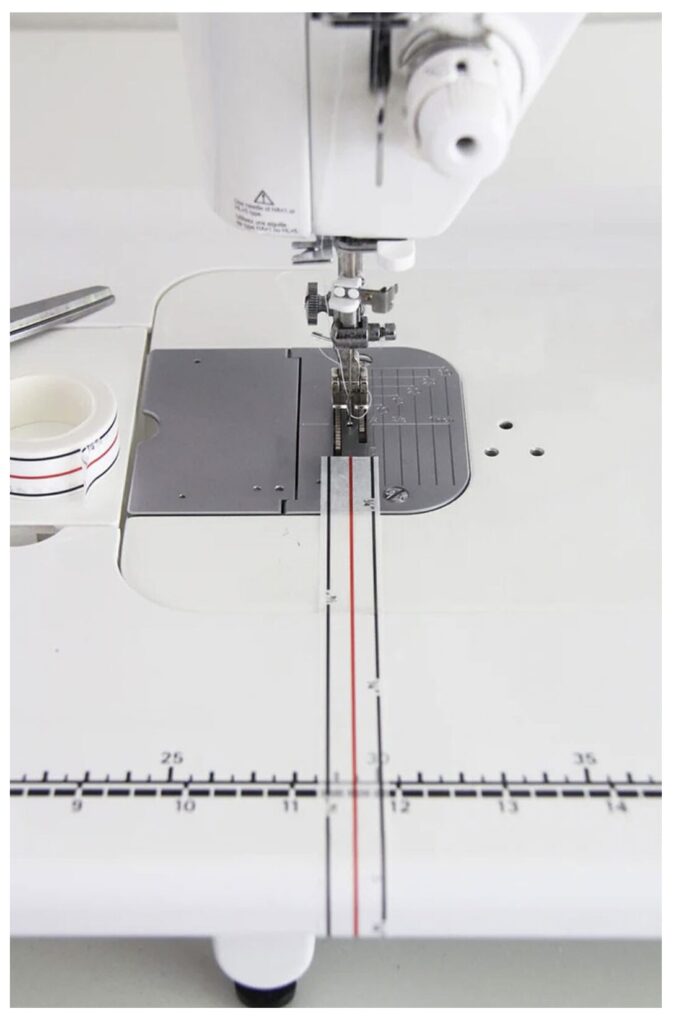
As with other guides, take time to position it correctly and test your setup. A guide is only helpful if it leads you to the intended stitching line.
5. Check Your Seam Allowance Frequently
Here’s a habit worth developing: never assume your seam allowance is perfect. Check it!
Even if you’ve been quilting for years, it’s worth checking your seam allowance when you start a new project, change your thread or fabric, adjust your machine, or notice that your blocks aren’t measuring as expected.
A seam guide is a useful tool for this. It helps you evaluate the distance between the needle’s stitching line and the fabric edge. You can also sew a test unit, press it, and measure the finished result.
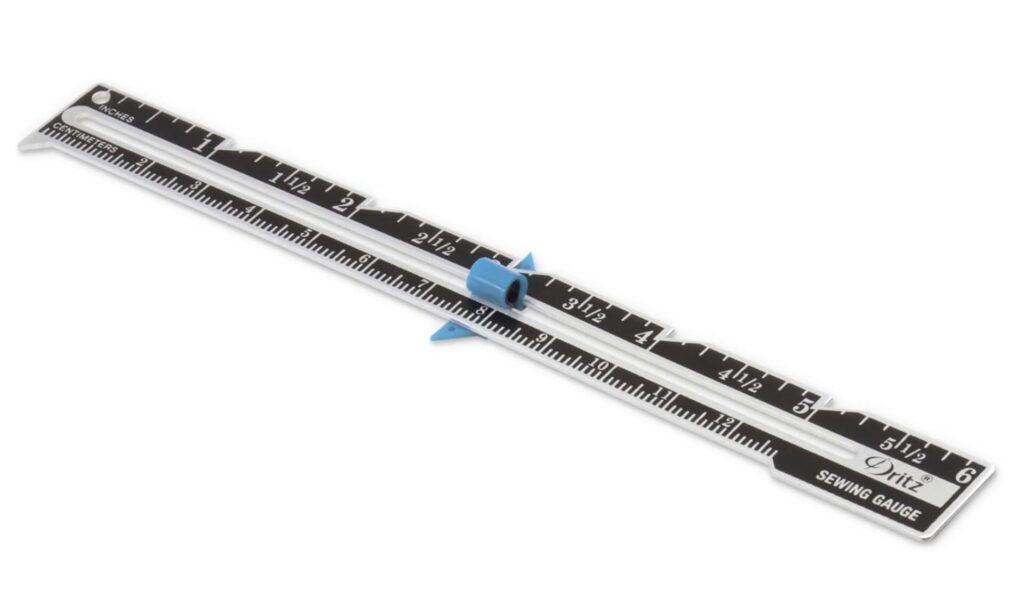
Here’s a simple way to check your process:
- Cut two strips of fabric 2-1/2″ wide and sew them together using your usual seam allowance.
- Press the seam using your normal technique.
- Measure the finished unit and compare it with the expected dimensions – the seam should be exactly 4-1/2″ wide.
- If the measurement is off, adjust your stitching line or guide and sew another test.
- Repeat until the finished measurement is consistent.
A simple two-strip test can tell you a lot about how your seam allowance, thread, and fabric work together. For more detailed checking, use a test unit with dimensions that make it easy to evaluate the seam allowance you’re trying to achieve.
Don’t check just once and assume the result will never change. Your machine setup, materials, and sewing habits can all influence the outcome. A quick check can save you from discovering a problem after you’ve pieced an entire stack of blocks.
6. Pressing Matters More Than You Might Think
Sewing the seam is only part of the process. How you press it affects how the unit lies, how the pieces align, and how accurately you can measure the result.
First, follow the pressing instructions for your pattern. Some patterns call for seams pressed to one side, while others call for seams pressed open. The best approach can depend on the block construction and how the seams will intersect.
When pressing, lift and lower the iron rather than dragging it across the fabric. Dragging can stretch or distort pieces, particularly when bias edges are involved. Take care not to push the fabric out of alignment as you work.
Do this test just once, and you will never push your iron on quilting fabric again.
- Cut two squares of fabric 6-1/2″
- Take one of the squares and press using a “press and lift motion” (straight up and down)
- Take the second square and press using a pushing motion, like you are ironing a shirt, across the fabric.
- Measure both squares to see if they are both still 6-1/2″ square.
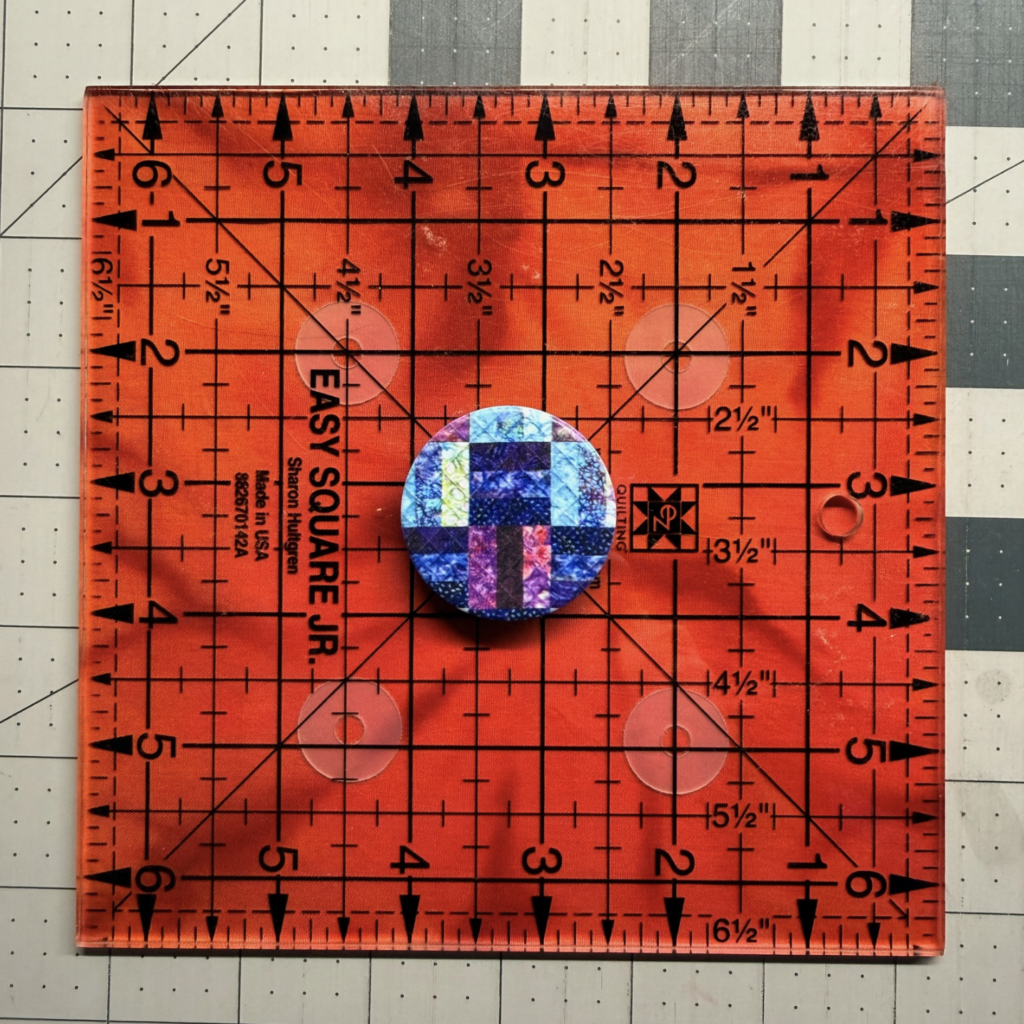
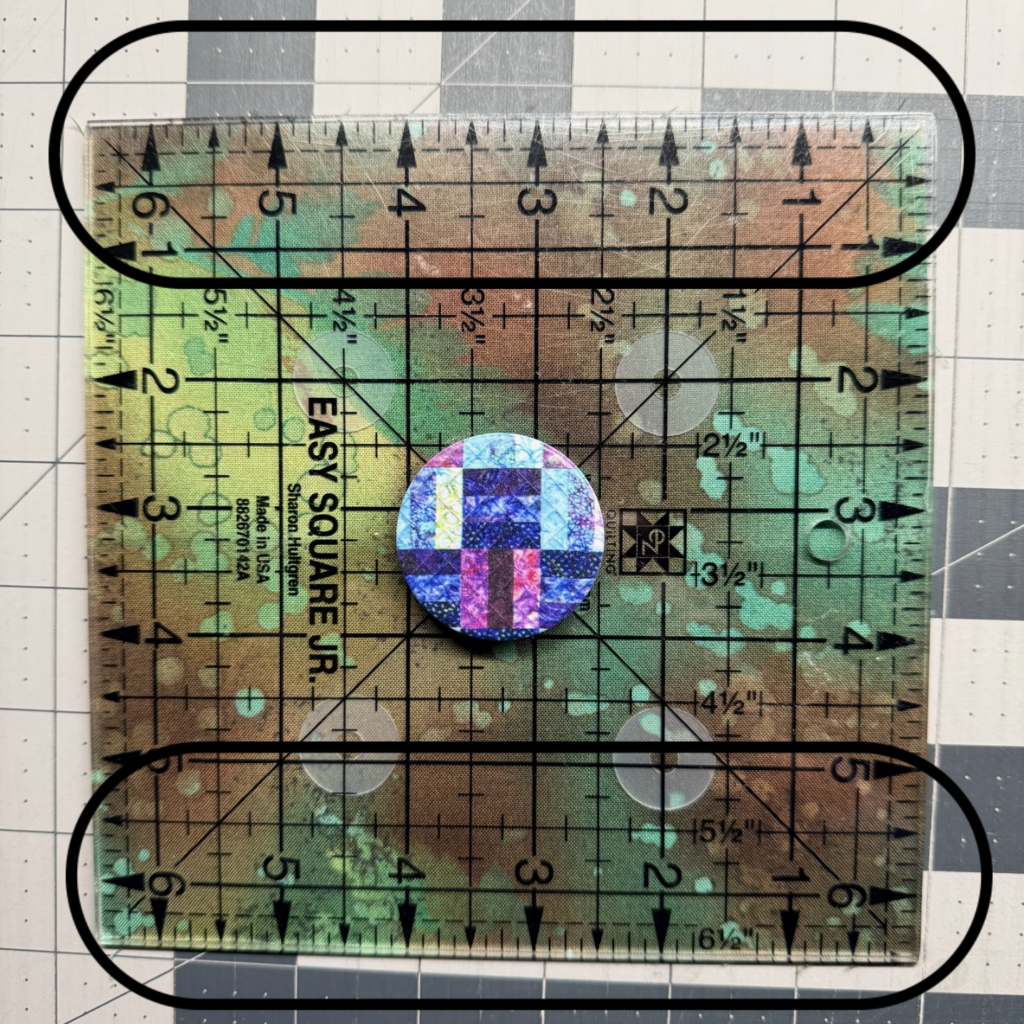
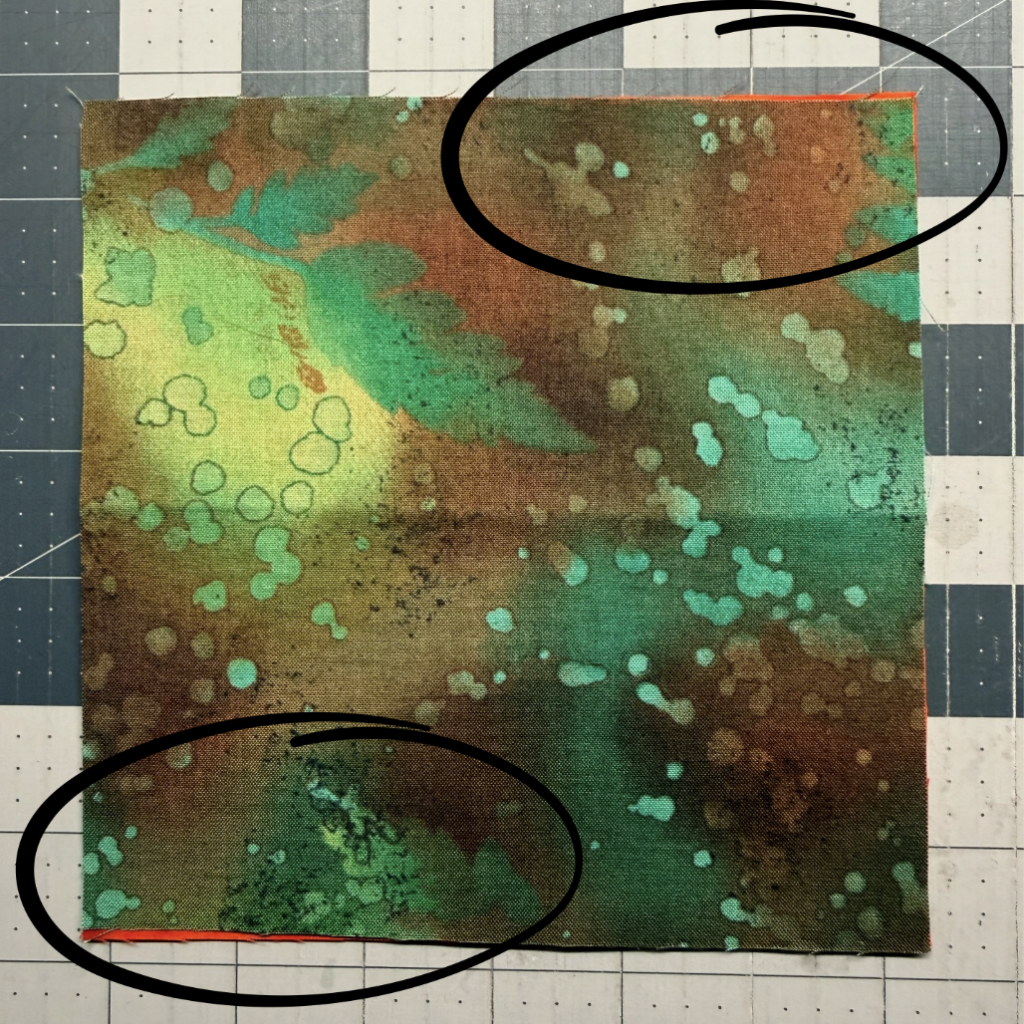
It may not seem like that shift could make so much of a difference – but over the surface of a block, a row, and an entire quilt top, that difference adds up. It also contributes to problems with seams matching up, points getting cut off, and the surface of the block and the quilt being ruffled instead of lying perfectly flat.
Try a wooden clapper
A wooden clapper can be a useful addition to your pressing routine. After applying heat and moisture as appropriate for the fabric, place the clapper over the seam and allow it to help the fabric cool and settle flat. This one lives at my pressing station and is used constantly.
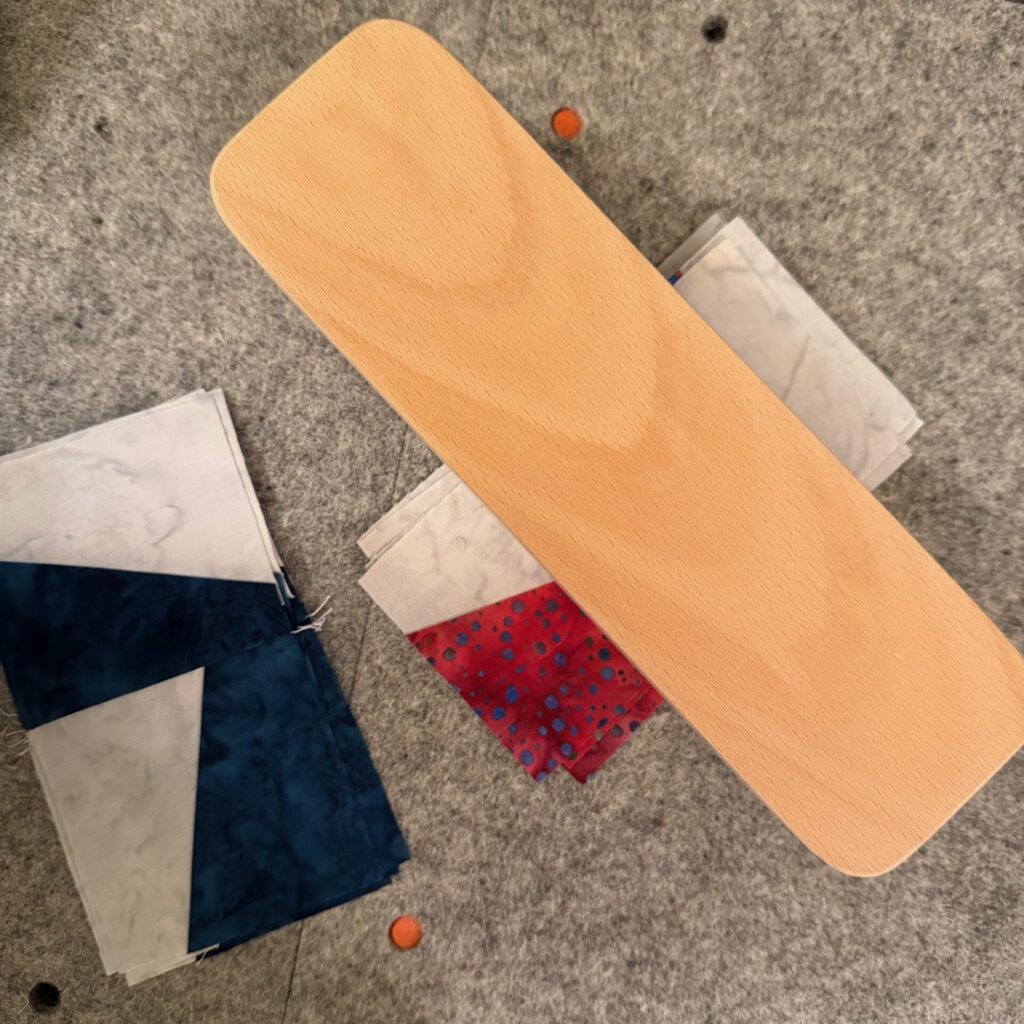
This can be especially helpful at bulky intersections, where several seam allowances come together. Flatter seams make units easier to measure and help subsequent pieces fit together more accurately.
A clapper isn’t a substitute for correct piecing, of course. It won’t fix a seam allowance that’s too wide or a unit that’s been cut incorrectly. But it can help you get the best possible result from accurately sewn seams.
7. Trim Units to Size Before Moving On
Many quilt patterns include trimming instructions for units such as half-square triangles, flying geese, and other pieced components. Those steps are important because they establish a consistent size before the units become part of a larger block. Skipping this step was one of the biggest reasons my blocks didn’t measure correctly.
It’s tempting to skip trimming when a unit looks close enough. But a unit that’s slightly too large or out of square can create difficulties later, especially when it’s joined to several other units.
When a pattern calls for trimming:
- Check the specified unfinished measurement.
- Align the ruler markings carefully with the unit.
- Confirm that the unit is square, not simply the correct measurement along one edge.
- Trim as instructed before joining the unit to the next section.
- Recheck the assembled section before moving on.
- Consistently trimming “Dog Ears” (those little triangles of fabric that show up when joining block units together) will reduce bulk.
Trimming helps bring units to a common size, but it has limits. If a unit is substantially undersized, trimming won’t fix it. If it’s too small to reach the intended measurement, stop and investigate the cause rather than hoping the next seam will somehow make up the difference.
The goal is to catch discrepancies early, when they’re easier to understand and correct.
8. Other Things That Can Affect Block Size
If you’ve checked your seam allowance, fabric preparation, thread, and pressing, there are a few other things worth considering.
- Fabric feeding. Let your sewing machine’s feed dogs move the fabric. Pulling or pushing it through the machine can distort the pieces and affect the seam.
- Cutting accuracy. Make sure the fabric is aligned properly on the mat, the ruler isn’t slipping, and you’re cutting through the intended number of layers. Accurate measurements on a ruler don’t help if the fabric shifts underneath it.
- Seam intersections. When joining units, align the seams carefully. Bulky intersections can make it harder to keep pieces flat and aligned, particularly when several seams meet in one place.
- Pattern measurements. Check whether the pattern gives the finished block size or the unfinished size. An unfinished block includes the seam allowances needed to join it to neighboring blocks, so it should measure larger than the finished block size.
- Assembly order. If individual units measure correctly but the completed block doesn’t, check how those units are being joined. Misaligned edges, inconsistent seams during assembly, and distorted fabric can all affect the final result.
These checks can help you narrow down the cause without having to start your entire project over.
9. Troubleshooting: What Should You Check First?
When your quilt blocks don’t measure correctly, use this quick-reference guide to help identify the likely cause.
| The problem | What to check |
| Most blocks are consistently too small | Seam allowance may be too wide. Check your thread, fabric thickness, pressing, and intended unfinished measurement. |
| Most blocks are consistently too large | Seam allowance may be too narrow. Check your machine setup and whether the pattern’s expected measurement includes seam allowances. |
| Some blocks are correct, but others aren’t | Check for inconsistent seam allowances, fabric shifting, cutting errors, and differences in pressing. |
| Units measure correctly but won’t fit together | Check that the units are square, the seams align, and the pieces haven’t stretched or shifted during assembly. |
| Diagonal units are repeatedly the wrong size | Check the cutting method, stitching line, fabric distortion, and trimming instructions. |
| Blocks measure correctly individually, but the quilt top doesn’t | Check the seams used to join blocks and rows, along with alignment and cumulative differences across the quilt. |
Use the table as a starting point, not a set of hard-and-fast rules. More than one factor may be contributing to the problem, so work through the possibilities one at a time.
10. Build Accuracy Into Your Quilting Routine
You don’t have to wait until a block is finished to find out whether something has gone wrong. A few small habits can help you catch problems before they become bigger ones.
- Press your fabric before cutting, and use a stabilizer if it helps you handle the fabric more accurately.
- Check your seam allowance with a test before beginning a project.
- Consider how thread weight and fabric thickness affect seam bulk.
- Use a quarter-inch foot, fabric guide, or Diagonal Seam Tape when it helps you sew consistently.
- Recheck your seam allowance whenever you change materials or machine settings.
- Press carefully and use a clapper when appropriate to help seams settle flat.
- Trim units to the specified size before moving on to the next stage.
- Measure a completed block before making a whole stack of them.
Above all, remember that accuracy comes from consistency, not from expecting every seam to be perfect on the first try. Even experienced quilters need to check their work, especially when they’re using unfamiliar fabrics, trying a new technique, or working with a pattern that has lots of small pieces.
When a block doesn’t measure correctly, resist the temptation to assume you’ve done everything wrong. Start with a test, check the likely trouble spots, and make one adjustment at a time. Once you find the cause, you can correct it and carry that knowledge into the rest of your quilt.
And that’s the real secret to more accurate quilt blocks: not just careful cutting, but a series of small, thoughtful checks that help every piece fit together as intended.
This is an important topic, so I have more than one post on the subject of perfect piecing. To learn more …
A Few More Tips for Perfect Piecing
Quilting Tips I wish I had Known
Happy Stitching!