
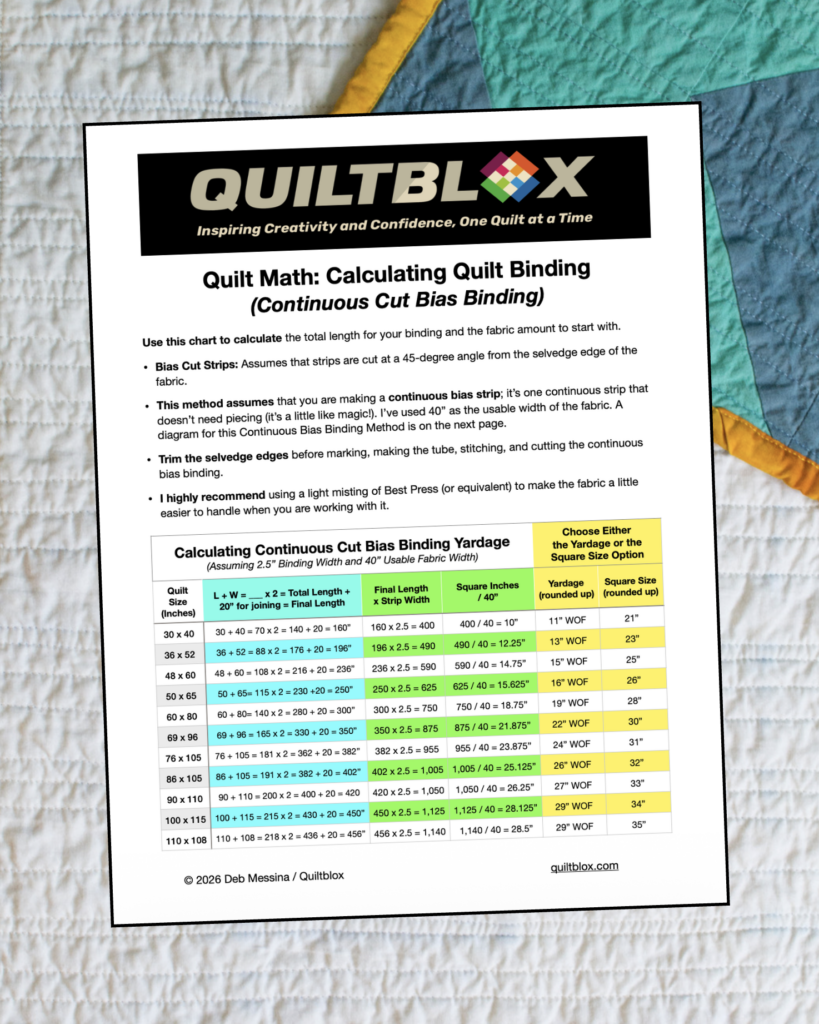
A couple of weeks ago, I shared the Quilt Math Chart for Calculating Straight-Cut Binding. Now, I’m back with a new Quilt Math Chart for Calculating Continuous Cut Bias Binding.
Bias binding is cut at a 45-degree angle to the fabric’s grain. Because the fibers run diagonally, the binding has a natural stretch that allows it to curve smoothly without puckering. That also makes it a bit tricky to handle without stretching it too much.
The diagonal grain distributes wear differently around the quilt’s edge, making it especially durable for quilts that will be washed frequently.
Bias Binding is Best for:
- Round quilts
- Curved edges
- Scalloped borders
- Decorative projects with shaped edges
- Heirloom quilts expected to receive heavy use
Advantages
- Easily curves around rounded edges
- Lies flatter on curves
- More durable over years of washing
- Often considered the premium choice for heirloom quilts
Limitations
- Uses more fabric than straight-cut binding
- Requires additional cutting
- Takes longer to prepare
My Thoughts on Bias Binding
Truthfully, I don’t make bias binding very often, but when I do, I prefer to make it as a continuous cut bias binding strip. As a result, there are no stretchy bias strips to join to create the binding strip. That’s a win in my book!
The other thing I rarely do is start with a square (although I’ve heard from some of you that you like that option). I prefer to work with WOF yardage. Getting the fabric perfectly lined up can be a fiddly challenge, and I have more success in less time with the WOF method. I also feel like it’s a better use of fabric – especially if I’m creating binding for a large quilt – and I need a large square to start with. It can be a challenge to find a surface big enough and a ruler long enough to make that work in my small space.
That being said, everyone has their preferences, and if you prefer to start with a square, I’m here for it. I’ve included the math for both options on the chart.
Frequently Asked Questions
Why the Continuous Cut Bias Strip (instead of cutting a series of bias strips and stitching them together)?
- As I mentioned earlier, I’m not a fan of joining a whole series of stretchy bias binding strips into one continuous strip. I don’t want to handle the bias-cut fabric any more than absolutely necessary. A single strip, with fewer seams, is easier for me to work with.
What’s the process for creating the Continuous Cut Bias Strip?
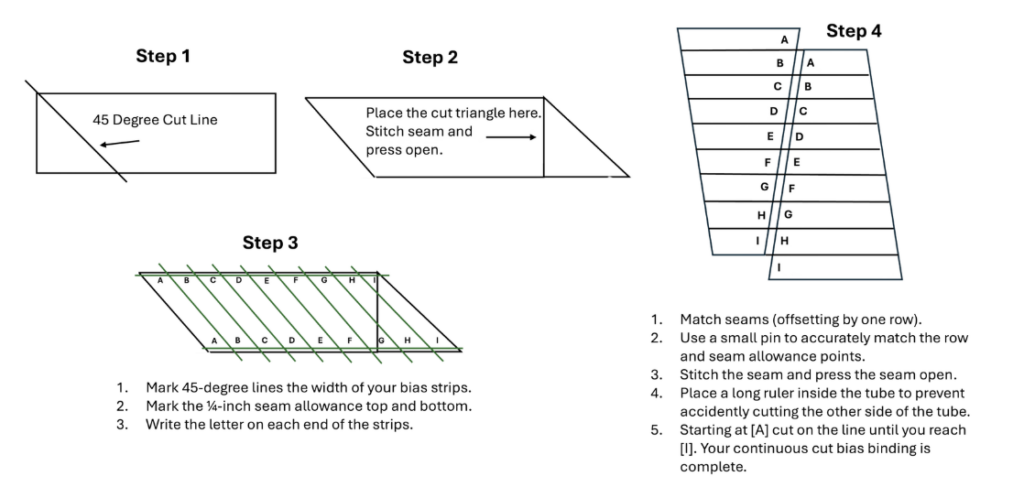
Do you have any tips for making and working with the “tube”
- Carefully mark the strip width and seam lines on the back of the fabric – using a fabric marker that you can see easily. Where those strip width lines and the seam allowance intersect will become very important when you are joining those edges to create the tube. Make sure you can see them.
- Use a small pin to poke through and secure the intersections where the lines meet. This is one place that those lovely little quilters clips aren’t quite accurate enough. I use the Magic Flat Head Applique Pins from Taylor Seville, but you can use any tiny pin you like.
- When you have all the intersections carefully pinned, stitch a basting seam instead of the final seam to join the edges together. Check your work to make sure your lines are perfectly straight. If not, remove the basting and give it another try. If it’s perfect, go ahead and use a regular stitch right over the top of the basting stitch (no need to remove it).
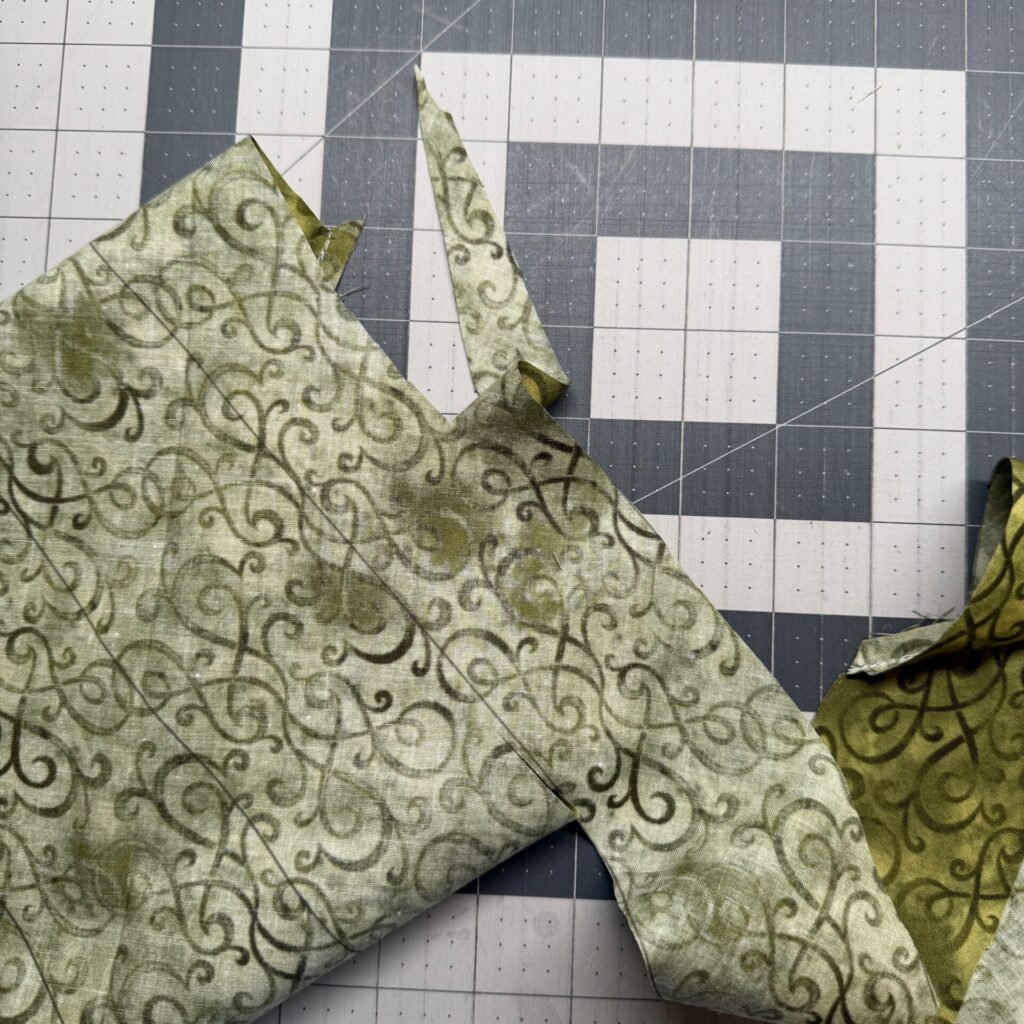
- Before cutting the tube apart into strips, slide a long ruler into the tube to prevent accidentally snipping or cutting the other side of the tube. How do I know this? Check out the picture below (some of us need to learn things the hard way).
There’s a Quilt Math Chart to make the process a little easier, and I’ve done the math for you. Use the button below the picture to download the chart. I’ve also included a bonus page that allows you to easily calculate the fabric requirements for any width of bias binding you want to create.
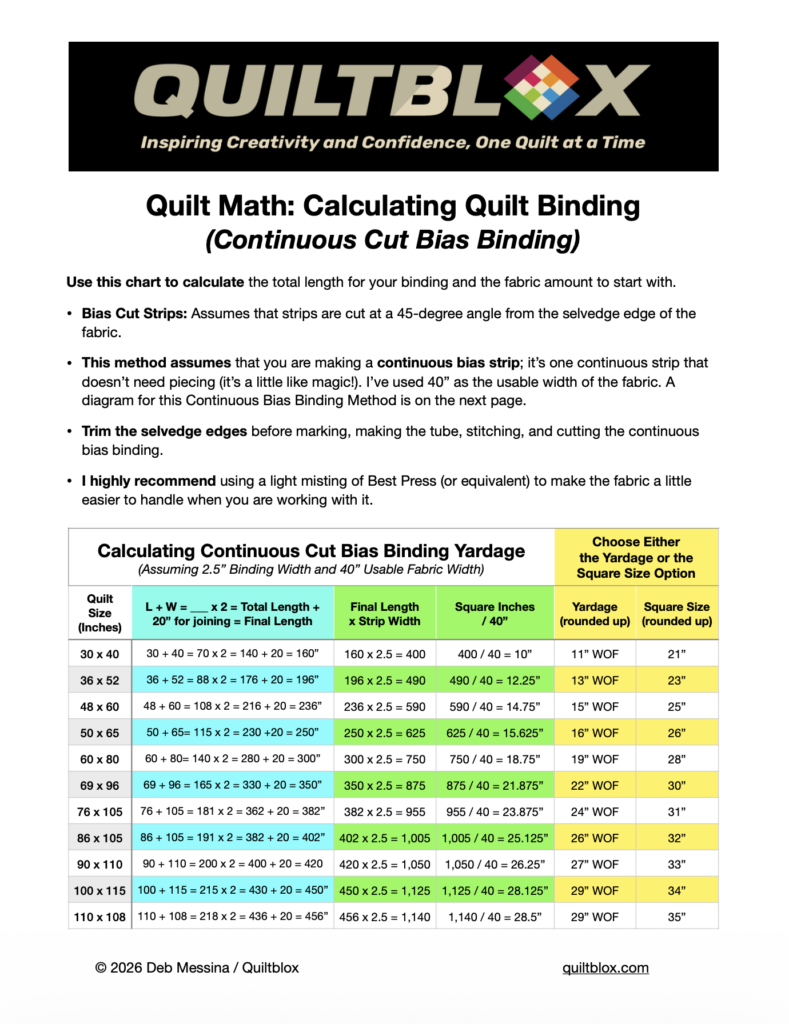
I hope this chart and the process diagram (also included in the download) help take the frustration and mystery out of creating continuous cut bias binding. If you get stuck, let me know.
Happy Stitching!